
Capturing Motion In Photography
Capturing motion in photography can be quite a challenge. When things are in motion you need to act quickly and go with the flow at the same time. But photographing movement can also be very fulfilling and exciting because it shows us aspects of life that are otherwise not seen by the human eye.
Movement photography ideas are sports photography, dance photography, wildlife photography, moving objects, photographing kids, and even portrait photography.
There are basically 2 ways to go about capturing motion in photography. You can decide to freeze the motion by using fast shutter speeds and you can blur the movement by using a slow shutter speed.
When you freeze the motion the result is a hyper-realistic image showing things that might not be registered by the human eye. Usually, the result of motion blur feels more abstract. The motion is visible leaving parts of the subject or the entire subject in a blur. Examples of motion blur photography are light trails and Intentional Camera Movement (ICM).
Both approaches are valid. The important thing is that you make a choice before you start to photograph motion because the roads that lead to these 2 outcomes are completely different. In this post, I will limit myself (and save you from overwhelm) to photography tips on how to freeze the action. You’ll also find some nice capturing motion in photography examples.
Go here to get a grip on Photography Terms And Definitions.
#1 Prepare Yourself
As with almost every kind of photography, preparation is important. You need to prepare yourself on 3 levels:
- Before you leave make sure you have at least 1 memory card that’s formatted and has a lot of space for all the action shots you wanna take. Because when you photograph movement you need to shoot a lot. It’s important to have a card that can store a lot of files, think at least 64 GB. And the faster the better.
- Then when you arrive, you’ll need to investigate the environment and look for places of interest. If possible ask a local for the best spots to shoot from. Scour different places and be prepared to move from one spot to the other. This will bring diversity in your shots. Once you’ve established a few great places to shoot from you can start to worry about your camera settings.
- Then you select the best camera settings for action shots. Image Quality, Focus & Drive Mode and Exposure Mode are motion photography settings you can select before you start shooting. I’ll get into those camera settings for motion shots more in-depth in the next few steps.
#2 Shoot in Raw
To be honest shooting in raw is a total no-brainer for me. I shoot everything in raw. Even when I’m photographing with my iPhone. Shooting in raw just gives you so much more freedom in the post-processing phase it’s a shame to not take advantage of that. Photographing action is no different.
The great thing about shooting in raw is your margin for error is bigger. That’s like a nice little safety blanket when you’re capturing motion and things are moving fast.
The thing to consider when your shooting in raw is that your image files will be quite large. That’s why you need a large memory card. Another thing to consider is the files are not stored on your memory card immediately. It takes the tiniest bit of time but there is a delay before it’s taken from the image sensor to the memory card.
For you to keep shooting and not having to wait for your camera to process the data and store it on the memory card your camera is buffering. That’s why a fast memory card is better when you’re shooting action.
When you feel the camera is really underperforming in this area and is taking its sweet time to process and store your files you could decide to select the highest quality JPEG files. But only if the slowness of the camera is getting in the way of you capturing the images you want.
Check out this post about Raw versus Jpeg to discover more about shooting in raw.
#3 Select Your Focus & Drive Mode
Your DSLR or Mirrorless has a few different ways to focus, the focus modes.
To tell your camera that you’re photographing subjects in motion you need to set the focus mode on AI-Servo when you’re shooting with a Canon and Continuous when you’re photographing with a Nikon.
If you have a different brand look it up in your camera manual to find what the focus mode for continuously moving subjects is.
And the second thing you need to select is your drive mode. This is the number of photos per second your camera takes. Select any setting that allows you to keep shooting as long as your finger is on the shutter.
Check out this post to find out more about achieving sharp focus.
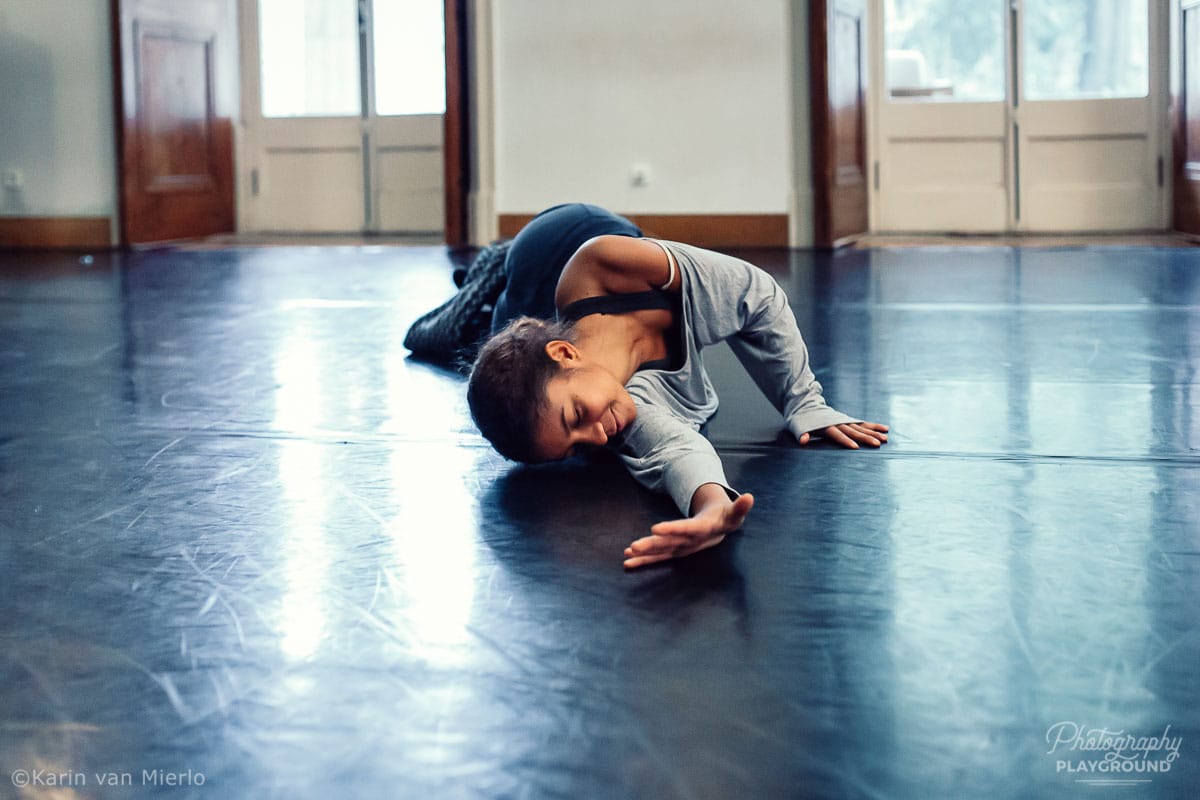
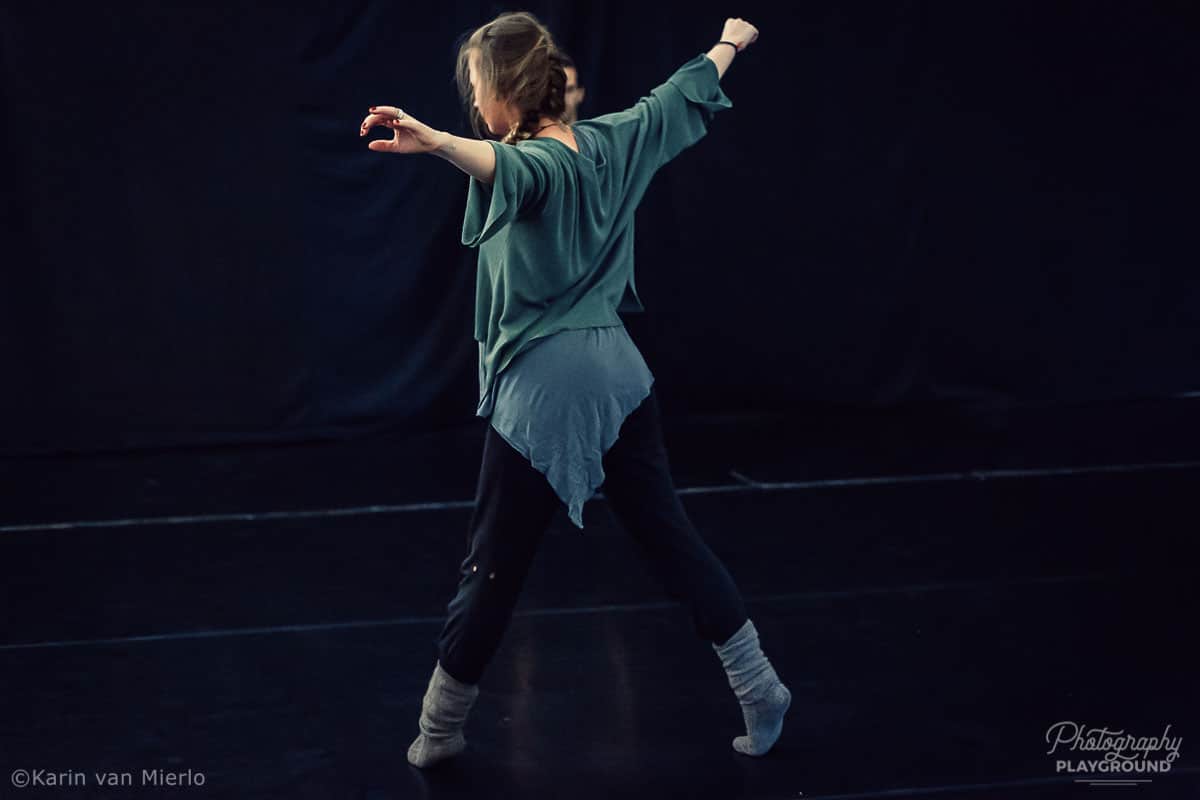
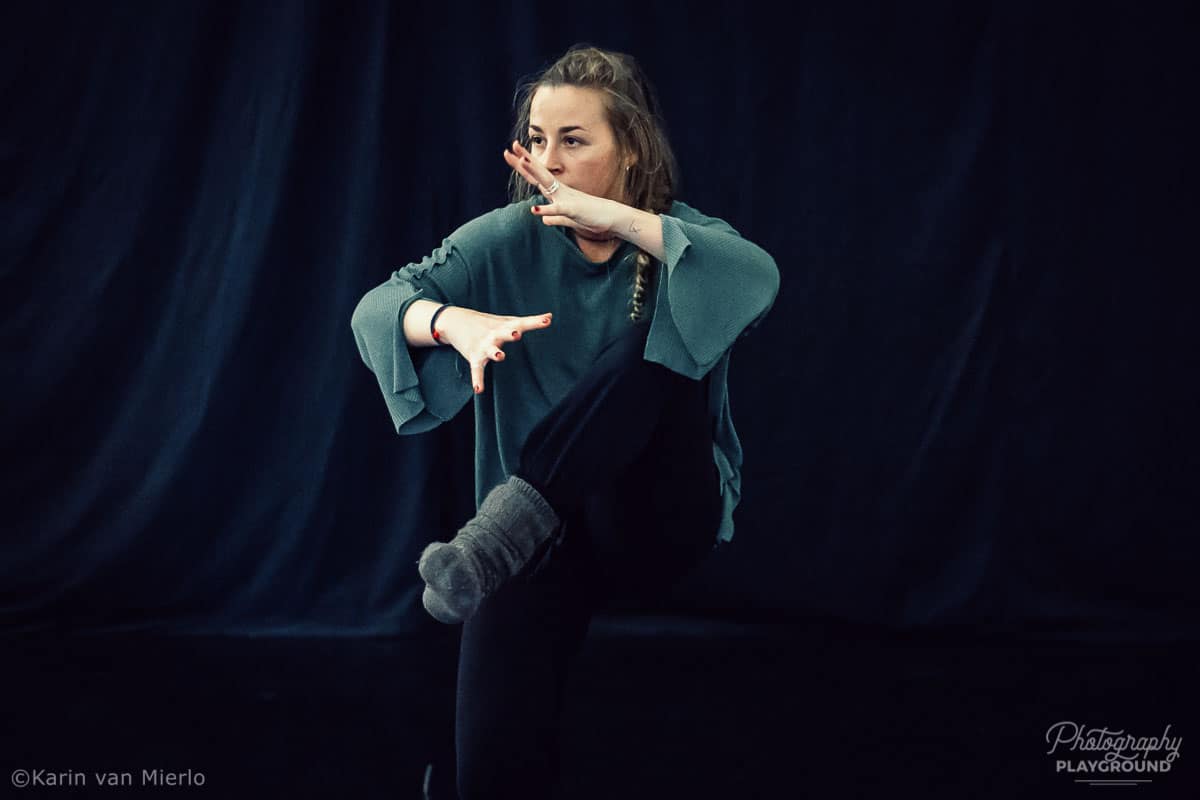
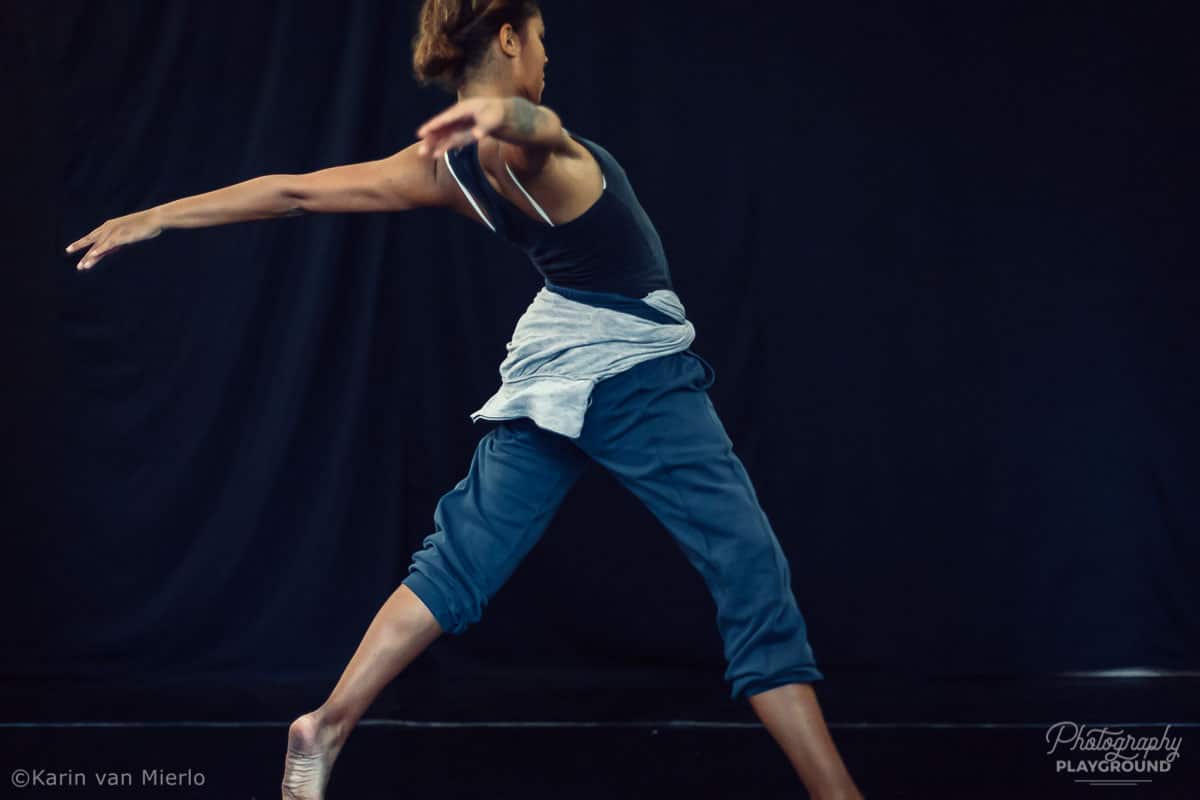
About the photos.
Sports and Dance are among the most challenging subjects when it comes to photographing movement.
I made this series of photos during a dance rehearsal of Area Cinzenta, a group of young dancers in Lisbon. If you want to see more you can check out their Instagram account @area.cinzenta.
#4 Shoot in Shutter Speed Mode
Shutter speed is king when it comes to capturing motion in photography. That’s why it’s best to shoot in shutter speed mode. Things are moving way to quickly to shoot in manual mode.
You start by selecting a fast shutter speed. Real fast. As in above 1/1000 sec. fast. Of course, this also depends very much on how fast your subject is moving. But let’s say above 1/1000 is the safe zone. You can be pretty damn sure you’ll be freezing the movement with this shutter speed. Anything between 1/350 and 1/500 you’re likely to see a slight blur when something is moving fast.
Then you select an iso setting that allows you to shoot with the fast shutter speed depending on the light. Don’t be afraid to sacrifice your iso for speed. The noise of a high iso is preferable to the blurriness of slow shutter speeds. And because you’re shooting in raw you can reduce the noise big time during post processing.
If you want to make your subject stand out against the background you can set a wide aperture to make the background blurry. (A wide aperture is a small number like f2.8). But try to stay away from the widest aperture because the range of sharpness will be very small which makes the margin for a focussing error bigger.
Direction & Proximity
Two more things to consider with the shutter speed are the direction of the moving subject and how close you are to the action.
- Direction: If your subject is moving toward you or away from you you can get away with a slower shutter speed. But if the subject is moving from left to right or in the other direction you need a faster shutter speed.
- Proximity: If you’re close to the action whether it’s through a longer lens or because you’re in the middle of it you need to select a faster shutter speed than when you’re further away. The closer you are the more visible the action becomes.
If you’re still shooting in Auto Mode go Manual Mode to take your first steps away from Auto Mode by learning to shoot in Program Mode.
#5 Be Safe
Go where the action is for compelling action shots but be safe. Try to find the sweet spot between immersing yourself in the action and keeping you, your camera and everyone else involved out of harm’s way.
Keep in mind that measuring distances is a little trickier when you’re looking through the viewfinder. You’re also completely focused on what’s happening in front of you so it’s easy to forget there’s a whole lot of living going on behind you. Be mindful of that. If it’s possible try to keep both eyes open.
#6 Follow Your Subject
Okay so now you have your camera settings out of the way let’s focus on the action. Because of the continuous focusing and the multiple shots per second you can just leave your finger on the shutter and follow your subject. Give it a rest every few seconds though so your camera can catch her breath and work through the files that are stored in the buffer.
Keep your eyes on the motion and don’t look at your LCD screen all the time. Look through the viewfinder and follow your subject. Shoot through the moment. So start shooting before it gets interesting and keep on shooting until it’s beyond interesting.
#7 Consider Your Point of View
Shooting from a low point of view is especially interesting for capturing motion because your subject will become larger. When you shoot from a high point of view your subjects become smaller.
But there’s more going on than that. The low point of view makes your subject look more epic somehow especially during a jump. What it does is not only making the subject bigger but it also changes the distance between earth and sky. The proportions change.
Capturing motion is quite often about being detached from the ground. Letting go of the connection with the earth. With a low point of view, you emphasize the being suspended between heaven and earth feel. Of course, this doesn’t apply to all motion photography but when it does choosing a low point of view can lift your image up to extraordinary.
#8 Give Your Subject Space to Move
Well obviously your subject needs space to move but that’s not what I’m talking about.
Give your subject space to move in your composition and preferably you give the space in the area of the frame the subject is moving to. The rule of thirds is a great composition tool to achieve that.
Let’s say someone is running from left to right then you want that someone to be in the left third of your frame. As a result, she’s running into the open space of your frame. It gives more of a dynamic feeling because there’s literally room to move.
Having said that playing around with this ‘rule’ never hurt anybody so experiment and reverse the idea. See how that works out and how it changes the feeling of the photo. The most important thing is to become aware of how these choices play out in the final image. Having room to move gives a photo a different underlying feeling than running against the frame of the image. You see what I mean?
#9 Cull Big Time
In photographing action you should always shoot a lot. Especially when you keep your finger on the shutter your camera spits out anything between 3 and 6 images per second. And let me break your little bubble here most of those images are not worth a second glance.
Nothing to be ashamed about that’s just the way it works when you’re capturing motion. It’s the reason why you have a bin on your computer. Because most of them won’t even be worth keeping in the deep, dark dungeons of your harddrive. Be ruthless, throw them over the edge and be done with them.
Getting rid of the so-so and bad files will make the good images shine. That’s the upside of this process. You have to let go of a lot of rubbish to find the beauties in the post processing phase.
Go looking for those treasures. Find the one image that best tells the dynamic of the moment in motion. There’s always a point where the movement is at its peak, where everything is in alignment.
Read more: How to Navigate the Library Module in Lightroom with Ease.
Final Thoughts
Capturing motion in photos is an exhilarating experience. Photographing motion keeps you on your toes and requires you to be fully present in the moment.
And now you know how to take pictures in motion. As with anything in photography, practice makes perfect. Especially when it comes to movement in photography. You will get better over time, get to a point where you can anticipate the movement, and be pleased with your photos in motion.
You can visualize what’s gonna happen a split second before it actually happens. That’s the best place to capture movement because you are fully prepared and completely in the moment.
Did you try one of the tips? Share your photos on Instagram and mention @photography_playground!


Hello Karin,
I was pleased when I came to your website through “Margaret Sixty &Me”. I love photography since I was a young girl, and did photography almost my entire life, but not as a professional, just for fun. Especially the last years, I don’t photograph so much anymore, and I still need so much help. For many years I worked with Pentax Dslr, now I have a Sony a6000. I know, to shoot in raw is much better but I did switch always back to jpeg because I love to send pictures to my family in Germany and with raw it just doesn’t work.
I searched for editing software (besides Lightroom), but for iOS I can’t find anything what has just average reviews.
Is there anything you can recommend to convert raw into jpeg what is easy to understand?
Thank you
best regards,
Gabriele
Hi Gabrielle, Most cameras have the option to shoot in raw and jpeg simultaneously. So the moment you press the shutter the camera creates two files of the photo, a raw file you can edit later and a jpeg file you can send to friends and family immediately 🙂 You can check in the settings if your camera has that option as well. Good Luck!