

How to Get Sharp Focus
Don’t you just hate it when you think you’ve taken a great photo only to come home and discover it’s out of focus? Getting sharp focus depends on your ability to get it right in the camera. There are no second chances or do-overs in Lightroom.
Although the term Auto Focus implies it’s done automatically it is not. For razor-sharp photos, you need to take control and guide the camera to where you want the focus to be. Believe me, there’s nothing automatic about that.
It’s Not Automatic!
The thing is you need to tell your camera in no uncertain terms where the tack sharp focus should be.
If you don’t your camera will focus on whatever it encounters first in its plane of sight. If that happens to be your subject……perfect. But if it’s not you’re stuck with a blurry picture.
If you’re one of the many beginning photographers who’ve wondered why your photos don’t have the sharp focus you so desire you’re in for a treat.
I’m gonna walk you through the entire process of getting sharp focus in camera starting with the most common causes for blurry pictures.
I’ll also share some things that affect the general sharpness of your pictures. Followed by the 8 steps you need to take to set yourself up for focusing success. And finally, I’ll go into some specific scenarios for good in camera focus.
What Causes Blurry Pictures?
Wrong Focus Point
When this happens there usually is an area in your frame that is in focus it’s just not the area you want to be in focus.
Camera Shake
When you press the shutter your camera makes a minute movement which can result in an overall blurry picture.
Subject Movement
When your subject is moving fast it can become blurry. Sometimes this is an effect you’re after but usually, it’s not. Having said that, if it is check out this post about how to embrace the blur in photography.

What Influences Overall Sharpness?
First, you have to understand that there’s a difference between general sharpness and focus. The overall impression of a photo can be crisp and sharp or soft and fuzzy. That’s completely different from a photo being in or out of focus.
Now you know that little secret let’s get into the aspects that have an influence on the general sharpness of the image. To be clear these aspects have nothing to do with the act of focusing itself.
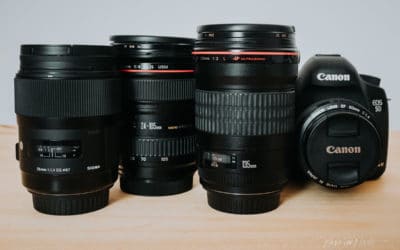
Your Lens
A prime lens will give sharper images than a zoom lens. And a high-quality lens will give sharper images than a low-quality lens.
A low-quality zoom will result in less ‘sharper’ images than a high-quality prime. This has nothing to do with how you’ve focused. Even if you focused perfectly the image can look soft because of the type and quality of your lens.
Another aspect that makes a difference is image stabilization. It avoids blur caused by camera shake and is especially useful when you’re shooting with a slow shutter speed. If your lens supports it, activate it unless you’re shooting with a tripod.
Your ISO
A low iso will give sharper images than a high iso. You need to use a high iso when there’s not enough light available. So this is something you cannot always control. If light conditions are poor you need to set a higher iso to expose properly.
An image that was shot with a high iso will have a general fuzziness. It becomes pixelated and grainy. More on how to deal with that in Low Light Photography.
Your Shutter Speed
As you probably can imagine the longer the shutter is open the bigger the chance your pictures become blurry. Either through camera shake or a moving subject.
To prevent camera shake and a blurry subject I always tell my students to shoot with a shutter speed of 1/250 or faster. Just to be on the safe side when you start.

Your Aperture
Aperture is basically the opening in your lens through which the light falls and you can make it big or small.
It determines the depth of field of an image which is the range of sharpness from front to back. If you shoot with a wide aperture the depth of field will become very shallow. If all is well your subject will be in focus but anything in the foreground and/or the background will be blurry.
And when you shoot with a small aperture the depth of field will become very large resulting in an overall sharp photo.
Aperture is measured in f-stops and I’ve always found it a little confusing to be honest because it somehow doesn’t follow logic.
A low number like f2.0 or f1.8 indicates the aperture is wide open resulting in a shallow depth of field.
A high number like f8 or f11 indicates the aperture is more closed resulting in a large depth of field.
A Creative Choice
The decision to open or close your aperture depends on the amount of available light. But there’s also a creative aspect behind that choice.
When you combine a shallow depth of field with the precise positioning of the area of focus you single out a specific aspect of your frame. This is a great way to lead the viewer’s eye to what you want to show and tell.
Wanna know how to creatively work with depth of field? Check out 4 Steps to Creating a Beautiful Blurry Bokeh Background.
Now that we have that out of the way, let’s take a look at the actual focusing steps you need to take to achieve sharp focus.
#1 Take control
You won’t be able to control your focus in auto mode. Your camera will decide on where she thinks the focus should be. And although of course, we all love our cameras that is not a decision we want her to make.
That’s why the very first step is to get out of auto mode. Obviously shooting in semi-auto or manual mode would be the best course of action. But if you’re not yet familiar with any of those modes shooting in Program Mode is gonna make a big difference already. Because in Program Mode you’ll be able to focus yourself. I’ve written a free eBook about Program Mode. Check out Starter Photography Playbook.
Need more motivation to get out of Auto? Read Manual Mode: 8 Compelling Reasons to Move Away from Auto Mode.
#2 Select Focus Mode
First, you’ll have to tell the camera how to focus before you tell it where to focus. You do this by selecting the focus mode. Check your camera’s manual to discover how to do this.
- In One-Shot (Canon) and Single Shot (Nikon) focus mode, the camera locks down the focus on your subject as long as you keep the shutter half-pressed. Use it for stationary or slow-moving subjects.
- In AI Servo (Canon) and Continuous (Nikon) focus mode, the focus will adjust as long as the shutter is halfway pressed. It will not lock the focus and focus is established the moment you press the shutter. Use it for action and sports photography. Anything that’s moving fast.
- AI Focus (Canon) and AF-A (Nikon) is a hybrid mode. It will do a single shot focus as long as your subject doesn’t move and as soon as the subject starts to move it will switch to continuous. It sounds ideal but in my experience, it results in way more blurry photos than necessary. So, I never use this focus mode because it’s the least accurate focus mode of the 3.
#3 Select Drive Mode
With the drive mode, you tell the camera how many frames per second you wanna shoot.
Roughly speaking you have 2 options. Single-Shot and High-Speed.
In regular circumstances, the single-shot option is fast enough.
But when you’re photographing sports or dance or any fast moving subject you want to select the high speed or burst mode. This allows you to keep your finger on the shutter, follow your subject and in combination with the AI Servo or Continuous focus mode you’ll achieve sharp focus.
If you shoot in Single Shot Drive Mode you‘ll have to press the shutter for every frame. And this can result in blurriness from camera shake. Also you’re more likely to miss moments.
Find out more about Capturing Motion in Photography here.
#4 Select Focus Point
The next step is to determine how many focus points you want in your viewfinder. There are a variety of choices depending on your camera.
But in general, you can choose between a single point or a zone.
Single Point
When you select a single point there’s just one focus point active. It’s the highlighted point or square in your viewfinder.
The most accurate way to focus is with a Single-Point. Use it if you want to have the most control in your focus. For instance, if you shoot with a wide aperture resulting in a shallow depth of field you want the focus to be tack sharp in the areas you want in focus. A single point will give you that control.
Zone
When you select zone there will be several focus points active in the viewfinder. This option is useful for shooting action.
I hardly ever shoot in the zone modus because a single point gives more accurate results. It also allows me to use the point in the center.
Because you need to know that not all focus points are made equal. Well, actually they are apart from the one in the center of your frame. That focus point is the most powerful and will give you the quickest and most accurate results.

#5 Move Focus Points
When you’re shooting with multiple active focus points the best way to focus is to move the zone around in your frame. Let me explain. When your subject is in the center of your frame your zone to focus is in the right place.
But more often than not your subject, the thing you want to have the razor sharp focus you’re after is not in the center. This will also give you more interesting compositions, by the way. Wanna know more about interesting composition? Check out Principles of Compostion in Photography.
If your subject is on the left side of your frame you ‘walk’ your focus points to that area to get sharp focus.
Check your camera manual to find out which button to use to move your focus points around in your frame.
#6 Focus and Reframe
The second way to focus is the focus and reframe method. This works best when you have a single focus point and you keep that point in the centre. Remember the most powerful spot of the frame when it comes to focus points!
You leave your focus point where it is, in the center and you move your camera to where your subject is. You point the center of your frame at the subject and focus with this powerful point by pressing the shutter half-way. Then leave the shutter pressed half-way and reposition your camera to frame the shot.
This might sound complicated and time-consuming. But in terms of time, in my experience, the focus reframe method is quicker than moving around the focus points.
It takes practice to focus like this but honestly every method of focusing takes practice. So you might as well start with the most accurate method!
#7 Look for Contrasts
The way your camera achieves sharp focus is by detecting small differences in contrast.
If you ever tried to focus on a plain white wall and your camera was suddenly taking a little nap you know what I mean. When you look for a little crack in that white wall and direct your focus point on the crack your camera wakes up and starts to focus.
So if it looks like you’re not able to focus, find differences in tone in your scene. Even the smallest difference is enough to activate your camera’s focus abilities.

#8 Support Your Camera
Now that you know the best ways to prepare your camera for super sharp focus it’s time to start shooting.
You will get the most optimal results if you know how to hold your camera. It seems like a small thing but believe me it’s not. When I teach an in-person workshop it’s always the first thing I address. Because how you support your camera has an impact on the sharpness of your images. It is an important technique to avoid blurry photos caused by camera shake.
- The most support should come from your left hand. You open your left hand and let the full weight of your camera rest in it. Then wrap your fingers around the lens. Not only is this the best way to support the camera it’s also the best way to operate the buttons. Because all the weight is in your left hand you have your right hand free to adjust your settings.
- The second step is to push your upper arms into your sides to keep your camera steady. And if you want to go even further you can position your feet hip-width apart. Yeah, you turned yourself into a living tripod!
- Okay, great, now it’s time to press the shutter. The best way to press the shutter is to leave your pointer on the shutter all the time. And when you press, squeeze it gently so it’s hardly visible your finger moves. Just a teeny tiny squeeze. That’s it!
Specific Scenarios
Landscape Photography
In landscape photography, there’s usually not a lot of movement involved. Set your focus mode on One-Shot (Canon) or Single-Shot (Nikon), your drive mode on single and select a single focus point. The best focus method is to focus and reposition your frame.
A large influence on the general sharpness of your landscape photos is your aperture setting. If you want to have the entire scene razor sharp and that’s usually what you want in landscapes close the aperture. This will give you a large depth of field. A small aperture is anything above f8.

Portrait Photography
When you have time to set your focus you should set the focus mode on One-Shot (Canon) or Single-Shot (Nikon) and your drive mode on Single Shot. Select a single focus point to give you the most precision.
In portrait photography, the cardinal rule is to focus on the eyes. With the single focus point, you’ll be able to aim the center focus point, remember the strongest focus point in your frame, at the eyes. Then reframe to make an interesting composition.
Go here for more info on shooting portrait photography outdoor!
Aperture in Portraits
In shooting portraits the aperture makes a big difference.
- For a portrait of 1 or 2 people you can decide to shoot with a wide aperture. When you shoot wide open the sharpness could drop even within the face and head making it even more important to have sharp focus on the eyes. As long as 1 or both eyes are in focus it’s fine to have blurry ears for instance.
- For shooting environmental portraits you should select a small aperture. A small aperture results in a large depth of field which is exactly what you want when you’re making a portrait that shows the person’s surroundings.
- When you’re photographing a group portrait, make sure you shoot with a small aperture. Why? Because that will ensure that the people on both the front row and the back row will be sharp. Focus on the person in the middle of the front row and you’re good to go.
Just a little reminder about aperture. A low number like f2.0 indicates the aperture is wide open resulting in a shallow depth of field. A high number like f8 indicates the aperture is more closed resulting in a large depth of field.

Reportage Photography
Reportage in the context of this post is about anything that doesn’t allow you loads of time to set the focus. The type of photography where you need to quickly adjust your settings because the subjects are moving fast.
First, select the AI Servo (Canon) or Continuous (Nikon) focus mode. This allows you to follow your subject and the camera will keep adjusting the focus. In general, the high speed or burst mode will work best when things are moving fast. Then select a zone of focus points. This will increase your chances of sharp focus in this kind of situation.
Shutter speed is very important in reportage to keep your subjects in sharp focus. The recommendation of 1/250 is the minimum in this scenario. Faster is better. And an aperture that’s above f5.6 will also make it easier to achieve sharp focus.
More on this type of photography in Candid Photography Tips or Photographing Children Documentary Style.
Generally Speaking
When you’re photographing stationary or slow moving subjects you select the One-Shot or Single Shot Focus Mode in combination with the Single Shot Drive Mode. Select a single focus point in your viewfinder and leave it in the center of your frame. Use the focus and reframe method to achieve sharp focus.
When you’re shooting fast-moving subjects you select the AI Servo or Continuous Focus Mode in combination with the High-Speed or Burst Drive Mode. You also want to select a zone of focus points and move those points around in the viewfinder to get sharp focus.
Don’t forget to pick up your free Starter Photography Playbook below! It explains all the steps to shooting in Program Mode including how to get super sharp pics!
That’s it…..your roadmap to getting tack-sharp focus in photography! Let me know in the comments if you have questions about a specific situation and I’ll be super happy to answer them.
Did you try one of the tips? Share your photos on Instagram and mention @photography-playground!


0 Comments