
Essential Lightroom Hacks
When you’re first starting out using Lightroom to edit your pics it can feel overwhelming. I know it was for me when I first took a glance inside the program years ago.
Getting an understanding of the basic steps you need to take to eventually export an enhanced file is not too difficult though.
If these steps are still a mystery to you I suggest you read 2 Lightroom Tutorials full of Lightroom tips and tricks, before you dive into this one. You can find them here:
Navigating the Library Module and Editing in the Develop Module.
And if you’re not yet familiar with Lightroom click here to can get a free 7-day Lightroom trial.
With this list of awesome Lightroom Hacks, I want to dive deeper into Adobe Lightroom and share some wonderful Lightroom hacks you’re probably not aware of. These Lightroom tips are gonna make your editing life so much easier.
They range from simple keyboard shortcuts you really should be using every time you edit to more advanced features that will save you time and frustration while keeping your edits consistent.
That sounds like magic, right? So, read on to become an editing wizard!
Lightroom Hacks in Library
For me, the most time-consuming aspect of photography is culling my pictures. Filtering out the good pics is perhaps the most important thing you can do in Lightroom. I want to highlight 2 keyboard shortcuts I use all the time that make culling my images almost hassle-free.
#1 Auto-Advance
The first is the Auto-Advance feature. When you turn on Caps Lock Lightroom will automatically go to the next file as soon as you’ve rated the file. No need to go back and forth with the arrows.
My method for the first round is a simple yes or no. In Lightroom terms, that’s Flag [P] and Unflag [U]. From there I move into Star rating and eventually end up with a tight selection of files I want to edit.
Click here to discover all the steps you need to take in Culling Your Files.
#2 Hide Panels
When you’re culling your images it’s important to have a clean interface.
But it’s also essential to be able to look up the specs of the file like ISO, Aperture, Shutter Speed quickly.
So instead of going into Full-Screen Mode, I prefer to hit the Tab key to toggle between a view with and without the side panels. To get rid of the top and bottom bars as well, press Shift + Tab.
Combining Hide Panels with the Auto-Advance feature creates a great workflow for culling.
#3 Create Collections
This is one of the more awesome Lightroom hacks and if you’re not using them yet I assure this Lightroom hack will change your life.
So what is a collection? Isn’t the Library neatly organized in folders and subfolders? Yes, it is! Usually, it’s organized by date and location. And that is a great way to organize your files.
The Collections Panel doesn’t replace that system, it adds to it.
In collections, you create folders based on the parameters you set. For instance, you can create a collection based on a subject like your boat, or your favorite person, or the most beautiful flowers you ever saw. Once you start using Collections you’ll see the possibilities are endless.
Lightroom provides you with basically 2 avenues to create Collections. One of the Lightroom tricks is to let it make Smart Collections based on the parameters you set or you can create Custom Collections. Let me tell you how this works.
Smart Collections
You’ll find the Collection Panel on the left-hand side of Lightroom and the best place to create collections is inside the Library Module.
By the way, did you know that it’s the only panel active all through Lightroom? So when you go to Develop it’s there and ‘Hello Collections in the Print Module’ etc.
When you click the plus icon a menu opens up.
Select Smart Collections… and tell Lightroom which type of files you want in your collection.
The amount of options is insane. You can create Smart Collections based on rating, date, location, metadata, focal length, etc.
You can also combine any of the parameters. How about creating a Smart Collection of 5-star files shot with a focal length of 50 mm. on a specific date.
Once you’ve told Lightroom what you want, hit create, and in no time you’ve made a new Smart Collection.

Custom Collections
This is the way I use Collections the most. To gather pictures I want to use for a blog post, or a course I’m working on, or a new ebook I’m writing, or a competition I want to enter.
Again you start by clicking the plus icon but this time you select Collections… give your Collection a name and click create. You will now find your Collection in the panel but it’s empty. You need to drag the files into the Collection.
If you have a lot of Collections I advise you to start creating Collection Sets and place different Collections with a common denominator in a Collection Set. Set is just another word for a folder.
What you need to keep in mind is that the file in the Collection is like a short-cut to the file in the actual folder.
So Lightroom does not duplicate the file when you drag it to a Collection. It creates a short-cut. This means that any changes you make in the file in a Collection will also be applied to the file in its original place. If you want to make a copy check out Create Virtual Copy.
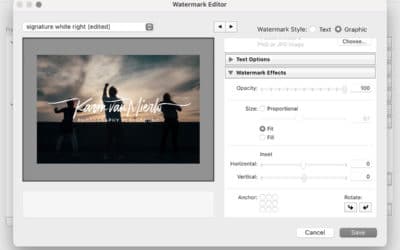
#4 Add Your Logo
This is a fun one. You can add your logo in the top menu bar or change your name. Lightroom automatically displays your Adobe account ID so if you want to change that or show a logo you can.
Click on Lightroom in the top menu bar and select Identity Plate Set Up…
Now you can personalize your Lightroom interface. You can even change the font and font size of the items in the menu bar.
#5 Adjust Menu
And that brings me to the top bar inside Lightroom because yes, you can customize this as well.
Just right-click in the top bar and uncheck any modules you never use.
Lightroom Hacks in Develop
#6 Customize Develop Panel
Customizing the Develop Panel allows you to create an editing flow that fits your level and needs. You can remove panels that overwhelm you or you can close all panels apart from the one you’re working in. Whatever suits you best.
To customize your Develop panel right-click in the grey bar underneath the local adjustment panel. You’ll see a couple of options.
You can customize your panel by changing the order and/or deselect adjustment panels you never use.

Solo Mode
Selecting Solo Mode will collapse all the panels except the one you’re working on. When you open another panel the previous one will close. This is a great mode if you get overwhelmed or distracted when you have all the panels open.
However, if you’re going back and forth between panels a lot it’s not the most convenient mode because you need to open up panels all the time. It depends on your way of editing. I like to tweak a lot and prefer to have all the panels open I’m working in.
You can also select Expand all and Collapse All. No need to explain that.
Go here to get a deeper understanding of all the features in the Develop Panel.
#7 Distraction-Free
A quick route to viewing your file in a distraction-free zone without collapsing side panels is the Distraction Free Mode.
It’s so simple! Just hit the L key and you’re all set.

The first click gives a dark grey background, the second click a black background and with the third click you go back to normal.
In this mode, you can advance to the next or previous file using the left and right arrow keys. It’s active in the Library and the Develop Module.
#8 Change Background Color
You can change the background color directly surrounding your file.
Medium grey is the most neutral color. When you’re editing this is the best background color because it hardly affects your perception of the colors in the file.
But if you want to see how a photo would look surrounded by white or black this is where you can preview that. During editing stay in the medium grey mode though.
To change the background color right-click in the area around your file. A window opens up where you can select the background color.
#9 Precision Editing
Especially when you’re editing on a laptop the size of the Develop Panel can be a bit of a problem when you want to make small increments using the sliders.
When you hover over the line dividing the panel from the middle area you can drag the line to the left to increase the width of the panel. This will give you more space in the sliders to be super precise.
#10 Virtual Copies
Virtual Copies is another awesome Adobe Lightroom hack. Ever wanted to know how a picture would look in let’s say black and white but you didn’t want to mess up the file? Create a Virtual Copy.

Having several virtual copies of the same file allows you to make different edits of that file and compare them side by side.
To create a Virtual Copy select the file, right-click, and select Create Virtual Copy.
#11 Before & After
If you want to see if you’re heading in the right direction with your edits or you want to compare the before and after you hit the Y key or the YY icon at the bottom.

You can select a left/right view, best if you have a vertical photo and a top/bottom view, best if you have a horizontal photo.
Another great shortcut is the \ key. Hitting that one allows toggling between the before and after.
Like these awesome Lightroom Shortcuts? Get the printable list of Super Essential Lightroom Keyboard Shortcuts here!
#12 Reference View
If you’ve ever tried to match the edits of different photos by going back and forth between them, never quite getting it right this is one of those Lightroom hacks that will make you go…. ’if only I’d known this before!’
I know I did when I discovered this one. And oh my it’s been hiding in plain sight all this time!

At the bottom you’ll find an icon that says RA, it’s right next to YY icon.
R stands for Reference, this is the file you want to emulate.
A stands for Active, this is the file you’ll be working on.
Click on it and the Reference View opens up. Drag the reverence file into the reference window and then select the file you want to work on to match the reference file. You can also hit Shift + R.
Try it, it’s the best way to keep your editing consistent.
#13 Change Crop Grid
Did you know your Crop tool has different grids? Well, it does. And you can toggle between them by hitting the O key.
Of course, there’s the 3 by 3 grid but it also provides you with grids like Golden Ratio, Golden Spiral, and Diagonal.
Selecting Shift + O will change the orientation of the overlay.
#14 Crop to Center
Another useful shortcut inside the crop tool is to select the Alt key when you want to crop directly to the center of the image.
Make sure the padlock icon is closed to keep the aspect ratio of your file intact.
#15 Visualize Spots
Dust and other rubbish on your sensor are a drag in itself but removing the stuff in Lightroom is even worse.
Enlarging to 100% helps a bit but, to be honest after a while, my eyes are like ‘I give up…no more spots..please!’

Enter Visualize Spots. It’s just a simple checkbox at the bottom of Lightroom but it makes all the difference. In a clear black and white overlay, you can spot your spots so much better and easier.
A quick way to delete a layer in the Spot Removal Tool is to select Alt, just click on the pin and poofff, gone! No need to select the pin and go to Delete.
#16 Single Auto Adjustment
In the basic panel, you have the option to select Auto, and Lightroom will automatically apply basic edits to your file.
I’m never a fan of Auto and this is no different. However, it is possible to let Lightroom Auto Adjust on a slider per slider basis. This could be useful if you want to know what Lightroom suggests for one aspect of the entire basic panel.
It works super easy, you hit Shift and double click on the slider you want to adjust. When you let go of Shift and double click again on the arrow or the slider description it will reset to zero.
If you want to reset all the sliders in a panel you hit Alt and a new option to reset all sliders becomes available.
#17 Show Clipping
Clipping the highlights or shadows means the area is either pure white or pure black. Especially clipping the highlights is something we want to avoid.
If this happens you can easily see it in the Histogram on top. The Histogram is a graphical representation of all the tones in your file.
On the left, we have the dark tones and on the right, we see the bright tones. If a lot of the spikes are either on the left or the right it indicates that the file is clipped.

A quick way to see if an area is clipped is by clicking one or both arrow icons in the top left and right corner of the Histogram.
This activates the clipping overlay. When an area is too dark it will show a blue overlay and when it is too bright it will show a red overlay.
But the quickest and easiest way to access clipping is to hit the J key and it will show you both. Hitting the J key again will remove the clipping overlay.
#18 Change Mask Overlay
When you’re using one of the Local Adjustment Filters checking Show Selected Mask Overlay will make the areas where you’re ‘painting’ visible.
By default this overlay is red but you can change the color by hitting Shift + O. Other available colors are green, white, and black.
A quicker way to toggle between showing the mask and not showing the mask is to simply hit the O key.
Wanna have a list of essential keyboard shortcuts right by your side while you’re editing? Get the printable list here!
#19 Finetune Painting
Combining the Brush, Graduated Filter, or Radial Filter with the Erase Function of the Brush allows you to clean up certain areas.
For instance, if you’ve painted outside the lines (and who doesn’t) you can go back in with the eraser and correct that.
You can find the Eraser at the bottom of the Brush Filter Menu. Setting the Size and Feather quite small will make it easier to be precise.
#20 Radial Filter
While creating a Lightroom radial filter it can be a hassle to get it at the edges of the image perfectly. There’s a little trick for that.
Press the Cmd on a Mac or Ctrl on a PC while double-clicking on the pin and it will make the radial filter jump to the edges of the file.
Lightroom Sync
This is where you’re gonna make big strides toward simplifying your editing life. With Synchronizing you can transport edits from one file to the other or a lot of others.
With one condition. The file must have been shot under similar circumstances.
For instance, there’s no point in synchronizing a file with optimal lighting conditions with a photo taken in a low light situation. Each of these files has very different needs. But if you have several files taken in that low light situation you can synchronize them.
But even when conditions are similar it’s still necessary to tweak every single image. No file benefits from the same treatment. Hey, they’re all different! Treat them like that.
Another thing to consider is that you can only apply adjustments for an entire file. Cropping is not something you want to transport from one image to another. As are Local Adjustments, Spot Removal, and adjustments made in the Transform panel. You can still apply them in your reference file but leave them unchecked in the Synching window. This only works in Sync mode though, not in Auto-Sync.

Syncing becomes available the moment you select 2 or more files and is located at the bottom of the Develop Panel.
Lightroom offers you 2 strategies to synchronize the settings of different files. Sync and Auto Sync. To toggle between them you simply click on the light switch next to it.
#21 Sync
When you select Sync everything you select in the pop-up window will be applied to the selected photo(s) after you’ve edited one photo. Sync is synchronizing after the fact.
Select the already edited file first and then the files you want to apply the same adjustments to and hit Sync.
#22 Auto Sync
With Auto-Sync you select a few images and edit just one. The adjustments will be applied to all images simultaneously. Auto-Sync is synchronizing during the fact.
#23 Match Total Exposures
Sync and Auto-Sync are both easy and most of all quick ways to edit a lot of images at once.
But it will not always work out perfectly when the exposures of the images are different.
For instance, if you need to increase the exposure in your reference image because it’s underexposed then that will be applied to all images including the ones that are properly exposed.

This is where Match Total Exposures comes in.
Select the images you want to work on, go to Settings, and select Match Total Exposures. Et voila, all your images will have similar exposures!
Then select Auto-Sync to edit the other aspects of the photo. Remember not to adjust the exposure in Auto Sync because then you’ll lose the exposure settings applied by Match Total Exposure.
And when you’re editing in Sync mode don’t forget to uncheck exposure in the pop-up window.
When you have a rough edit of the synched images go into Reference View to tweak them and keep them consistent.
Lightroom Presets
And finally, let’s have a look at Presets. You thought I’d never bring it up, right? Well, here it is!
If you think synching will make your life easier you are in for a treat. Presets is Synching on steroids.
There are many ways to use Presets but I’ll highlight a few of them for you. But remember, even with Presets you’ll always need to tweak individual files to make them look their best.
The difference between Syncing and Presets is that you can not pick and choose edits on a file by file basis. When you give a file the Presets treatment all previous settings will be reset to the Preset.
#24 Creating Presets
If you have a series of photos you want to have a specific and consistent look Lightroom Presets are your best friend.

Select one of the images in the series and create the look you’re after.
Then hover over to the left side of the Develop module and click on the plus icon in the Presets panel.
This will open up a new menu. Select create preset, give your preset a name, and hit create. That’s it! You just created your first Preset.
The next time you want to edit images with that same look you just select this Preset in your Preset menu, tweak it and you’re done.
As in syncing add only edits that will apply well to the entire file. So, when you create the Preset select only the menu items in the pop-up window that apply to the entire file.
#25 Importing Presets
And of course, you can buy Presets. No shame in that I think. It’s like buying a specific type of film or printing paper in the old days for a specific look.
It’s super easy to import them.
First, you have to buy them obviously. Then save them in your Lightroom folder or any other location you know where to find them.
Then go into Lightroom, select the Develop Module and click on the same plus icon for creating your own Presets but now you select Import Presets. Select the Presets files and click Import. That is it.
When you’re editing with a bought preset you need to consider that no preset matches all the photos. Choose the preset that works best for a specific series of photos and tweak. Always tweak!
A preset should always be the starting point and never the end result.
There you have it! 25 Lightroom hacks to make your life a little easier so you have the time and energy to go out shooting more.
What was your most ‘I wish I knew that like ages ago’ moment?
For me, it was the Reference view……I can’t believe I never saw that before I finally did!
Did you try one of the tips? Share your photos on Instagram and mention @photography-playground!


Some really great tips, I’m guilty of not using collections enough and now this is my new goal. Thanks, great post!
Thank you! Collections are the best 🙂 They make my editing life so much easier.