
Snapseed Tutorial
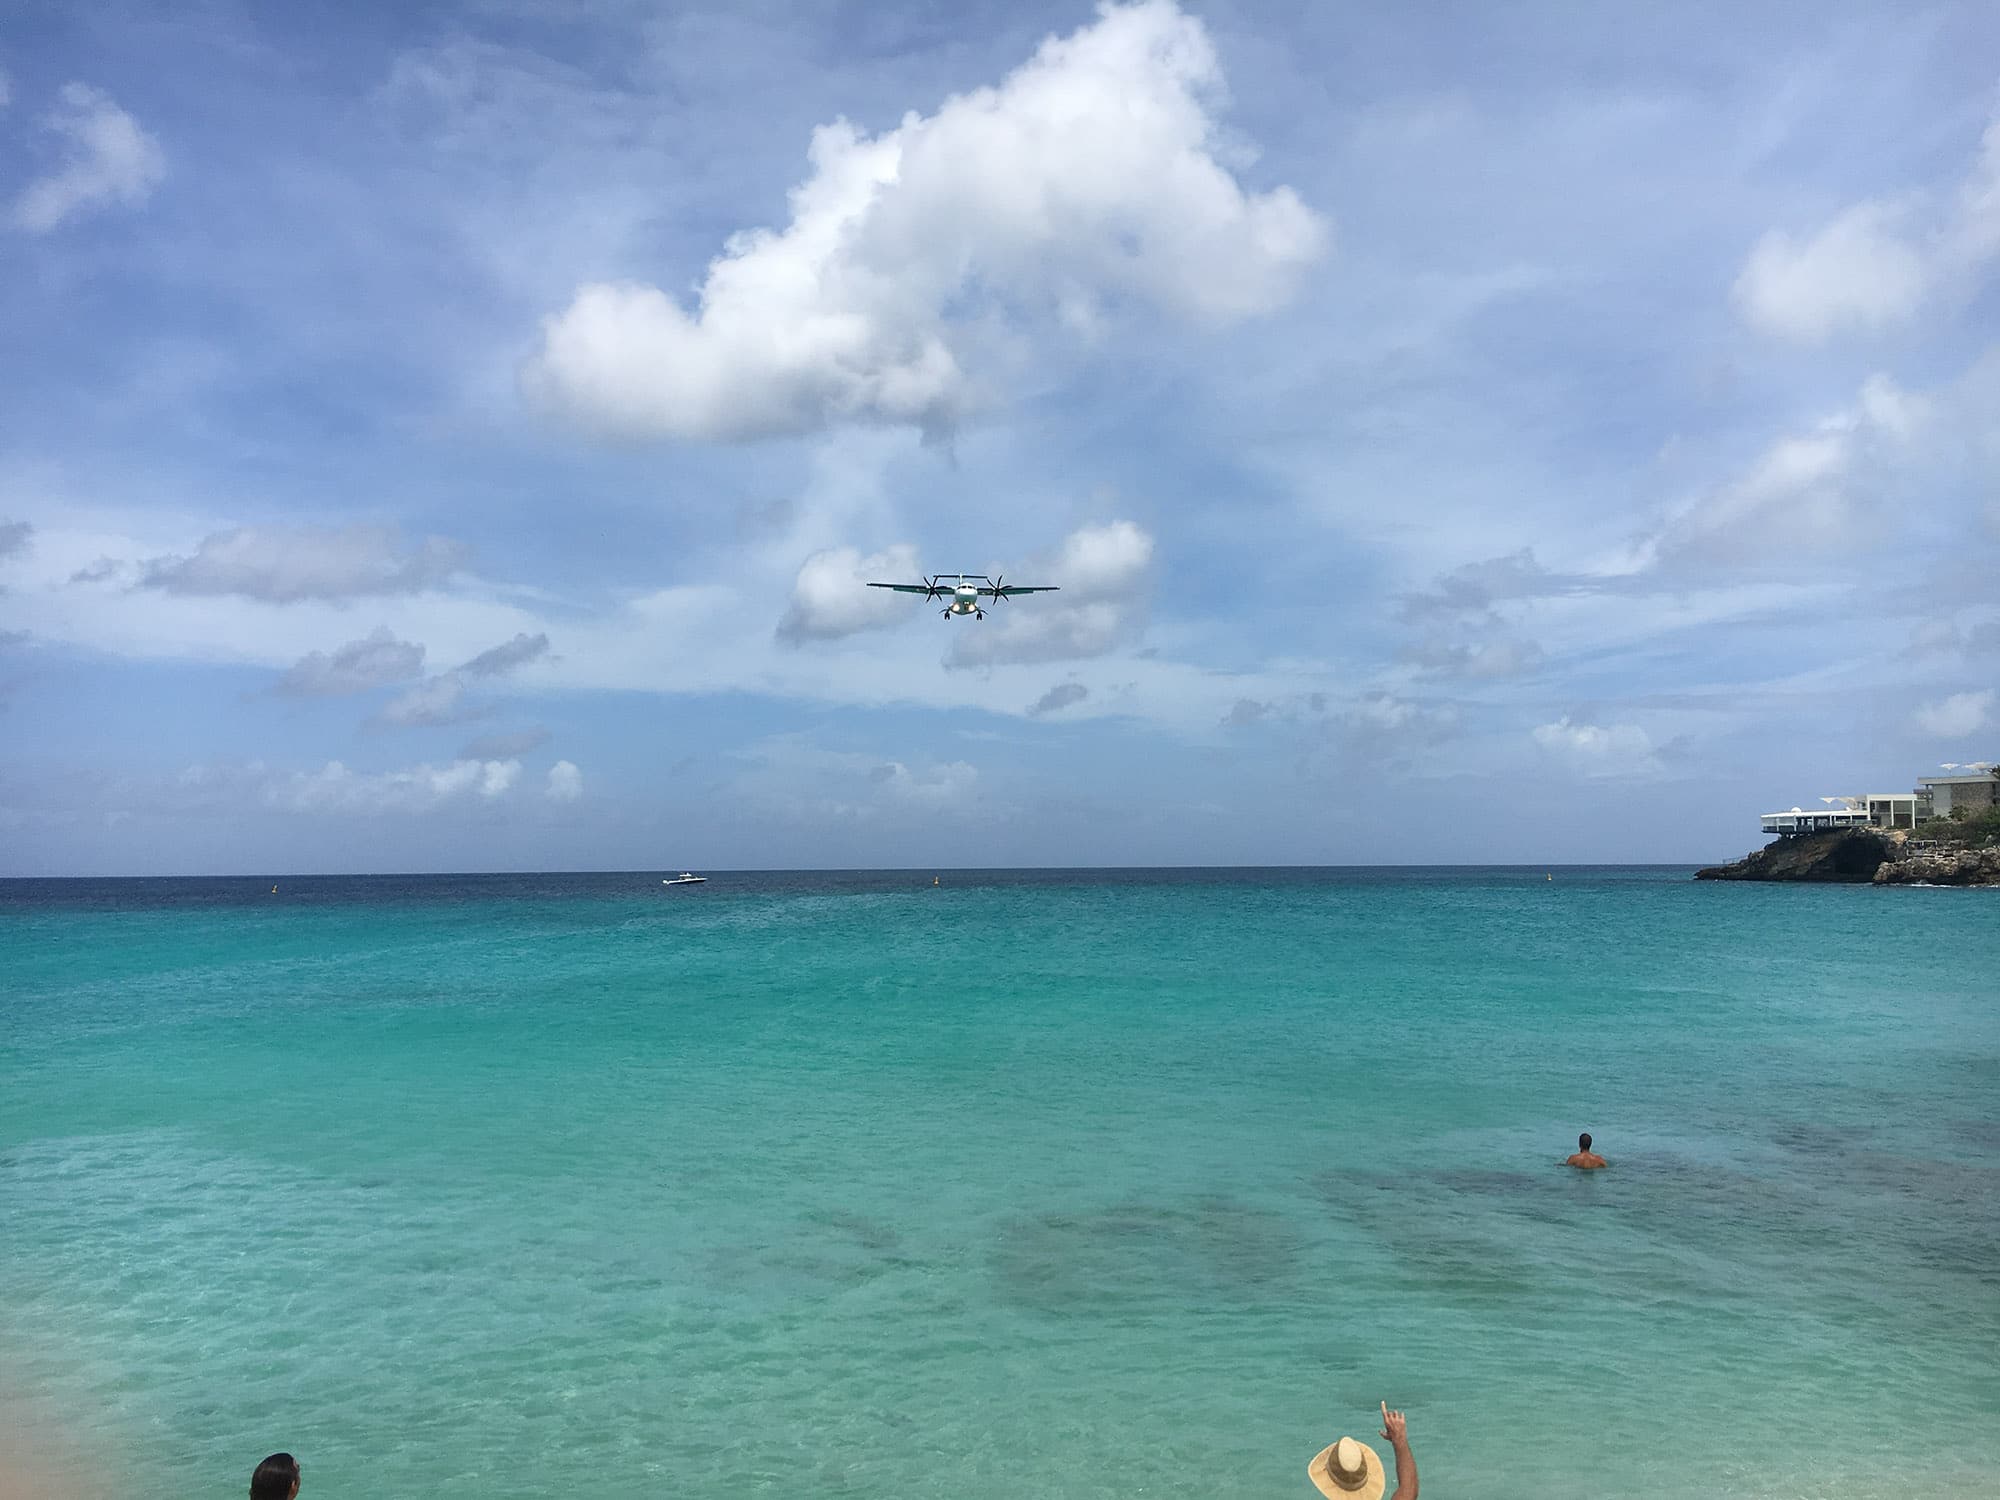
Last year I made an amazing journey sailing from Colombia to Portugal on the Nomad Cruise. On the way, we made one stop on Saint Maarten Island in the Caribbean. The island itself is not the most interesting place but I did want to go to the beach where the planes fly over.
I’m always trying to take photos of this kind of touristic hotspots a little bit different. So I positioned myself in such a way that all the tourists on the beach would be out of my frame. When I saw this guy with the hat I knew that would be my shot.
Later when I checked the image on my phone I felt a little disappointed. The photo did not reflect my experience of being on that beach at all.
It has a couple of flaws. Most embarrassing one being my finger in front of the lens. But that is not the only thing. The colors and contrasts are flat and there are more distracting elements.
But I could see the potential. So I started to edit the image in Snapseed to make it come alive.
The Importance of Editing
Do you feel the same sometimes when you look at your photos? Are they not what you expected them? Fat chance that a little editing will fix that problem!
So why do you need to edit? Why is it important?
Of course, everything starts with the image. Your photo needs to have the potential to be great. You cannot turn a bad photo into an amazing image by editing.
For me, the purpose of editing is getting the best out of a photo.
To align the experience with the image. Because that is what a photo should do. It should ignite a feeling. It should bring you back to that place, at that moment. And usually, a little editing will help you to make that happen.
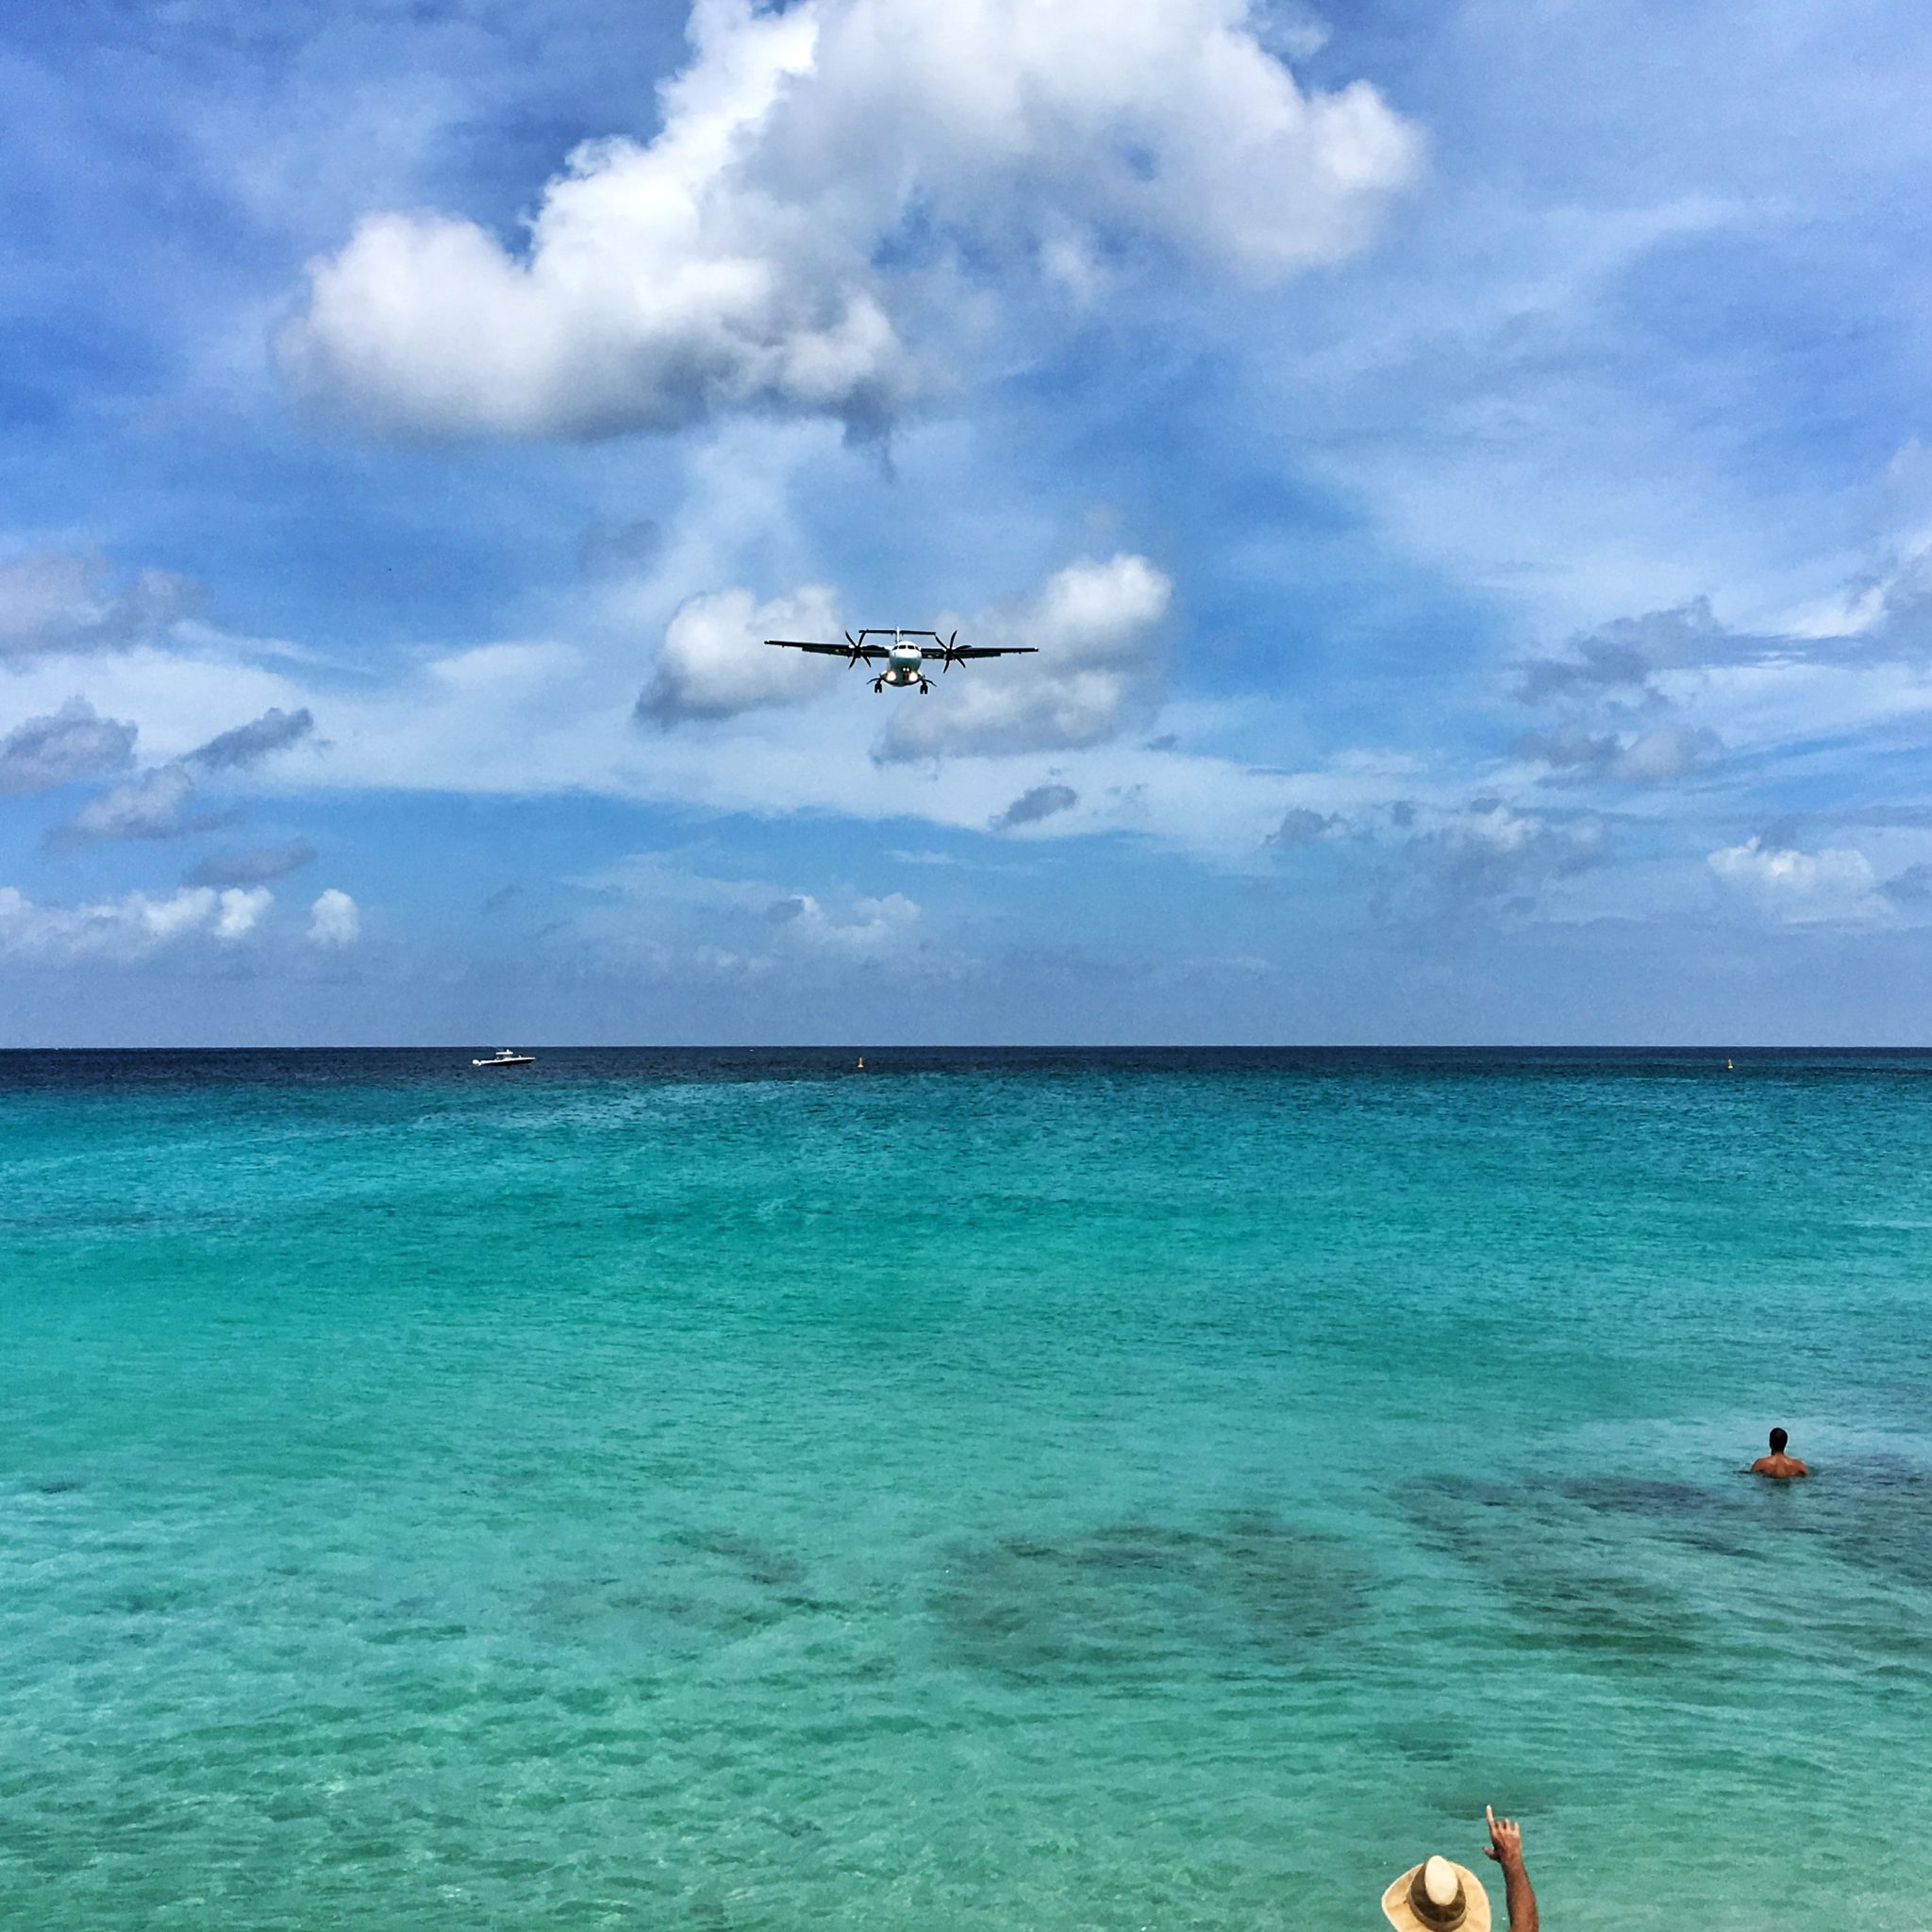
This is the image after I made some adjustments in Snapseed. Nothing major, I cropped out the distracting areas of the image and I worked on the colors and the contrasts.
Knowing Your Way Around Snapseed
So let’s get started! I assume that you know very little about Snapseed. Maybe it is even the first time you heard about it. So let’s start with downloading the app!
First things first
- Download Snapseed from the App Store or Google Play.
- Put the icon on your home screen so you have quick and easy access to it.
- Then you need to choose the photo you want to edit. You will speed up this process by making a folder with the images you want to edit. This way you don’t need to look for them between hundred of other images. You can also put them in your Favorites folder.
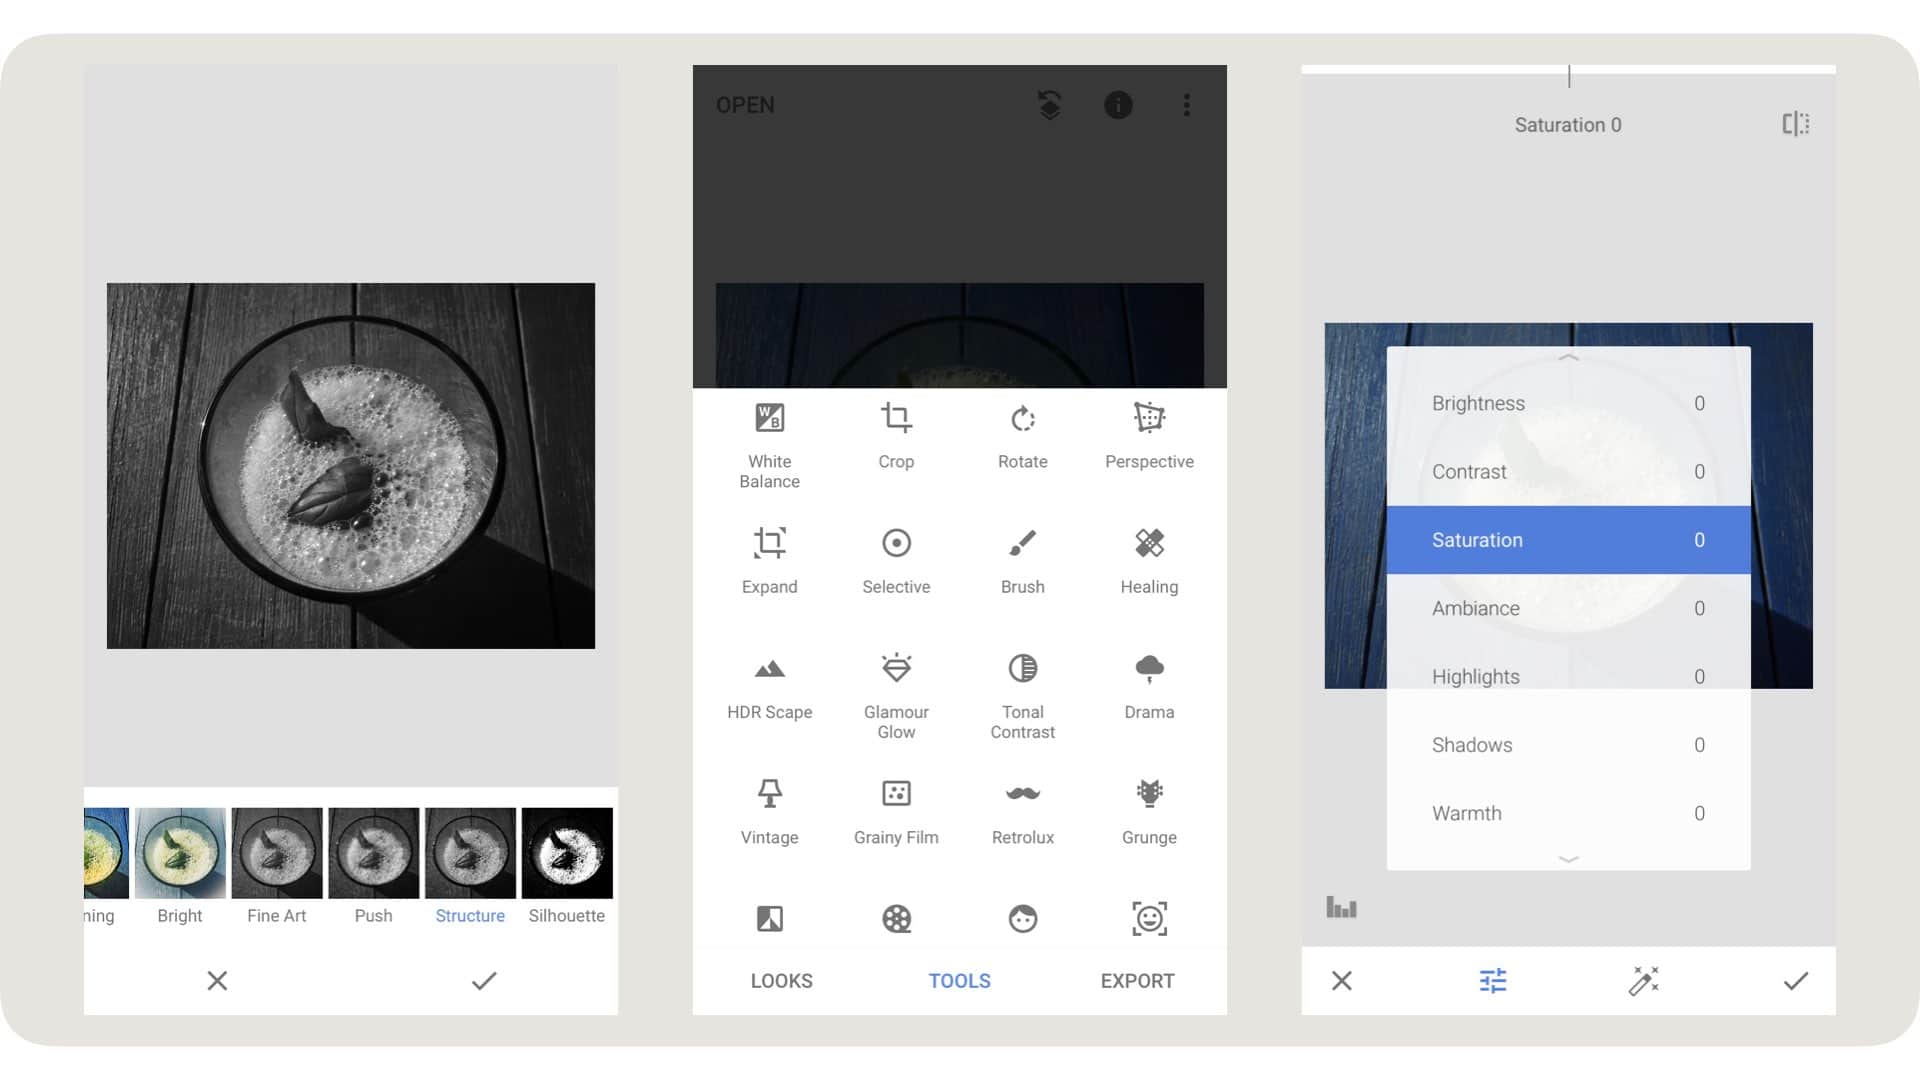
- Once you opened the image, you’ll see 3 options: Looks, Tools and Export
Tools and Looks
- In the Looks section, you’ll find the different presets. You can also save a series of edits you made yourself in the Looks section.
- In the Tools section, you can make adjustments and edits. You’ll also find Filters like Drama, Black and White, Vintage and Grunge here. The good thing about Snapseed is that you can adjust the strength of the filters.
- Inside a Tool, you have a lot of different options. To access the options swipe from bottom to top or click the slider icon on the bottom. In the top of your screen, you can see the tool you have selected.
Making Changes
- By swiping from left to right you can increase or decrease the adjustment you are making.
- By clicking the magic wand icon Snapseed will adjust your image automatically. Not something I use but you can give it a try.
- If you want to toggle between this step and the previous one you have two options. You can push your finger on the screen or you can touch the icon in the right side corner.
- To apply the changes tap on the tick icon.
- To cancel the changes tap on the cross icon.
The Editing Steps
Now that you have familiarized yourself with the basic principles let’s have a closer look at how that works in the photo I took at Maho Beach, Saint Maarten Island.
#1 Straighten
In Rotate, I align the horizon. The app will straighten a clear horizontal or vertical line automatically.
#2 Crop
I choose Crop, to get rid of the distracting elements left and right of the image I cropped it into a square. I also believe that this image works better in a square format.
#3 Drama Filter
Then I apply the Drama Filter. With this filter, I am laying a foundation for more contrast. I reduce the filter strength to around 20 and bring the Saturation back up to zero.
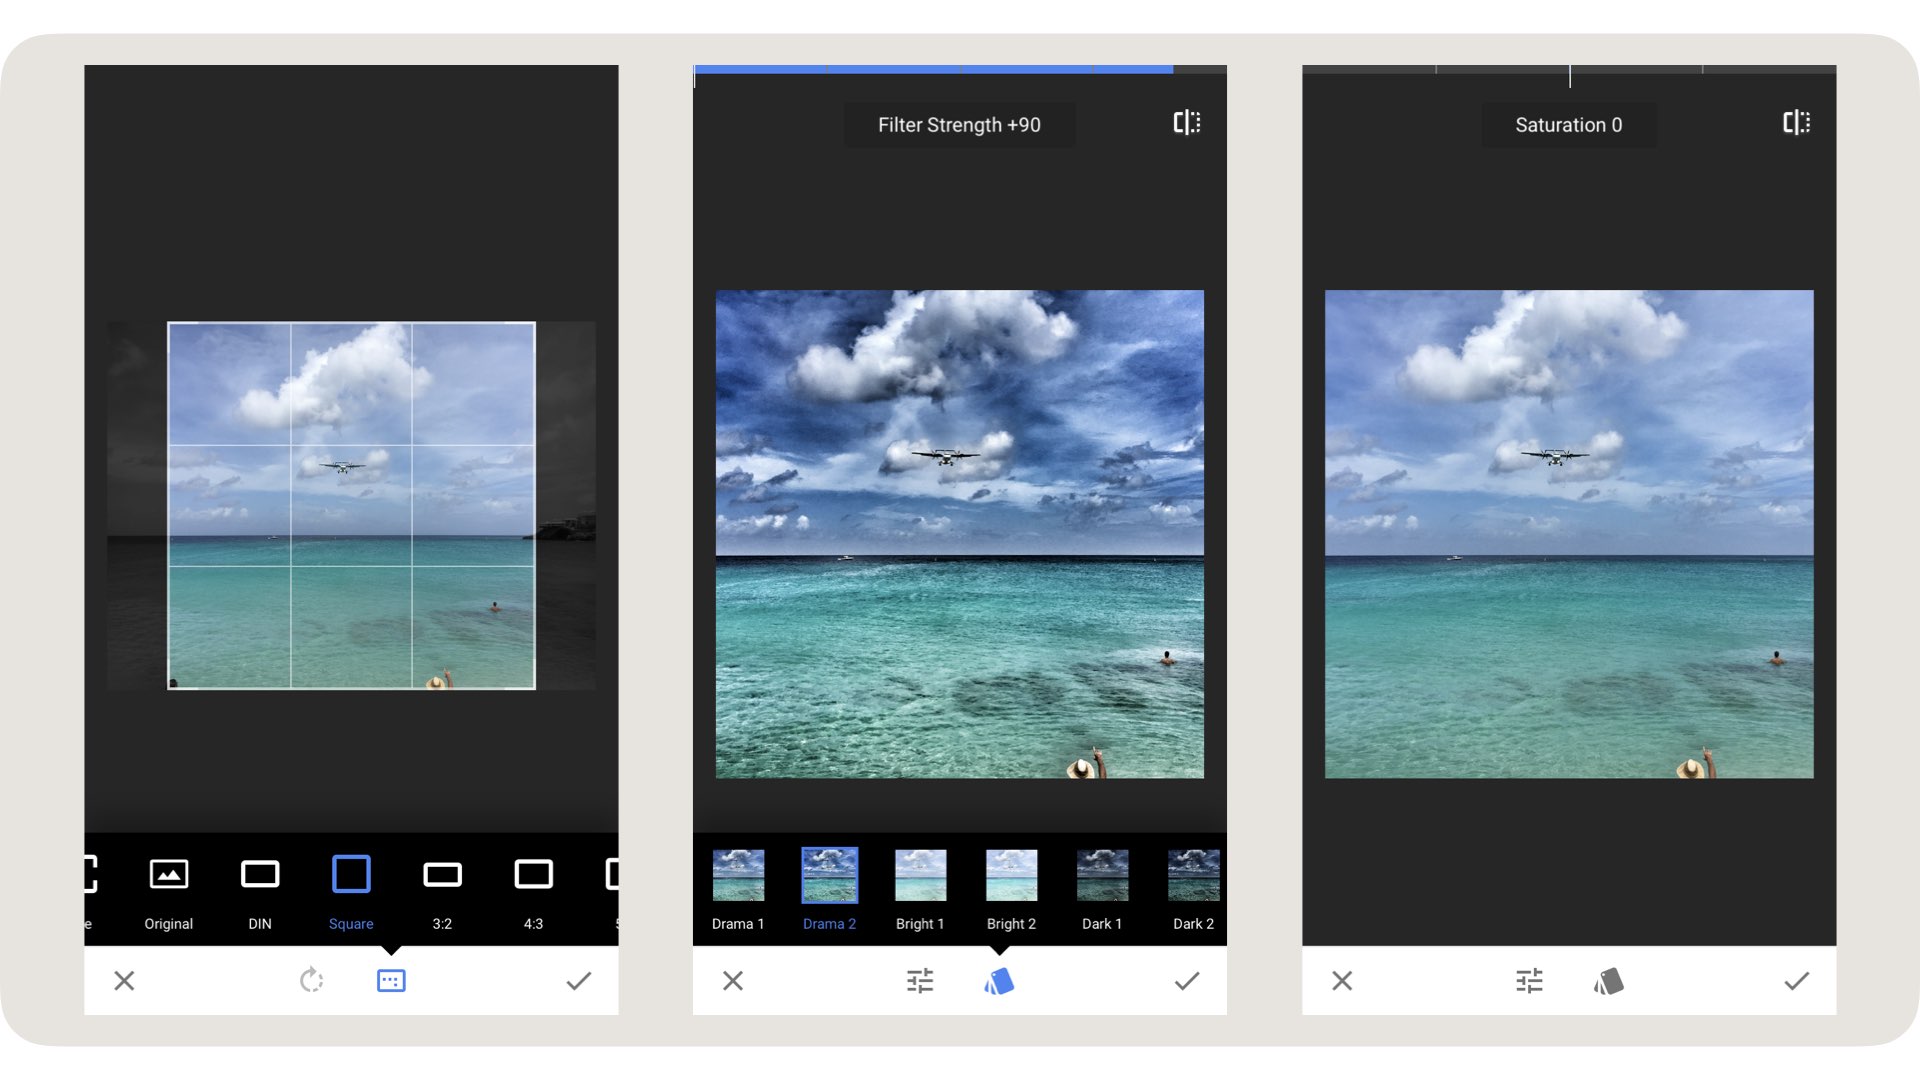
#4 Tune Image
In Tune Image, I increase the Contrast, the Saturation, and the Highlights and I lower the Shadows.
#5 Details
Now all I need to do is sharpen the image a little bit in Details.
#6 Export
And because I always shoot in RAW I have to export the image as a separate Jpeg file. If you shoot in Jpeg like most beginning photographers do, you can choose the Save or Save a copy option. Click Save at the top of your screen.
And then I’m done!
Before and After
Let’s take a look at the Before and After of this picture.
On the left, you see a flat, undersaturated photo that doesn’t do very much for me.
On the right, you see the edited photo. The difference is huge in my opinion. The edited photo evokes a feeling, you want to jump into the crisp, clear water. The visual elements of the photo are in balance and they all stand out more.
It took a few minor adjustments to transform this image from so..so into a WOW shot. But you need to realize that his WOW factor was inside the image all along. It just needed some tender loving aftercare to make it come alive.
Love a good Black & White image? Check out the Snapseed Black and White Tutorial.
Wanna become a Phone Editing Superstar? Check out Fabulous Phone Editing! A smartphone editing course entirely about Snapseed and VSCO!


Thanq for this basic information.
You’re welcome 🙂
Good idea and smart