
Wildlife Photography
A few weeks ago I got back from a trip to Uganda. It was a social impact workation organized by 22 stars, a charity foundation based in the Acholi Quarters in Kampala.
For those of who has no idea what a workation is, well it’s basically a vacation where you have a lot of free time to work. As a digital nomad, those are the best vacations for me 🙂
In this case, I photographed the projects the foundation runs in Uganda. I spend most of my time in the Acholi Quarters as a humanitarian photographer.
As part of the workation we made a trip to Murchison Falls National Park, one of the best safari parks of Uganda. Of course, I also took a lot of photographs there and I want to share my experience of shooting an African Safari with you.
Let me start off by saying that I’m by no means experienced in wildlife photography. I’m a people photographer. Yet, I have to admit that while doing the research my ambitious photography heart wanted to become a wildlife photographer.
You know, no matter what field of photography I get into I want to be my best self. I was tempted to spend a fortune on the longest lens available.
Because my research told time and time again that shooting with a long lens on an African Safari is the only way to go. I spend hours dribbling over the best the industry has to offer. I even looked into renting a long lens. I was getting sucked into the black hole of the importance of gear versus the importance of vision.
Focus on Vision
But in the end, it wasn’t worth it for me. I knew I would have to drag along that heavy long lens all through Uganda for only 2 days of photography. But more importantly, I knew I would not use it for a n y t h i n g else I was going to photograph, not in Uganda or anywhere else. The importance of vision won.
I’m not the type of photographer that keeps her distance and uses a long lens to come close. I want to be part of the action. I need to be in the middle of things. Which is why my favorite lenses are either a 50 mm or a 35 mm (full-frame).
Long story short I didn’t buy the long lens nor did I rent one. I decided to go at it with what I had. To challenge me to take the pictures that tell the story of the experience. To focus on the emotion and overwhelming beauty of my first African Safari.
I want you to be able to do the same. I want you to come home from your Ultimate Roadtrip with photos that tell the story of your experience. Let me share with you some tips on how to photograph an African Safari.
Even if you don’t have the gear for wildlife photography.
The Preparation
#1 Do Your Research
Any trip should start with a little research. It’s in the nature of travel photography to be uncontrollable. So anything you can do to take some uncertainty out of the equation is a plus. You have to keep in mind though that you will face unexpected events and then you will have to be able to improvise.
- When you’re going with a tour company make sure you have a professional guide. A good guide should have the knowledge and the experience to bring you to the right place at the right time. Guides are usually in contact with each other. If something exciting happens he’ll be the first to know and take you there.
- We drove around in a car with a roof that opens up so we could stand in the car. The roof also protected us against the sun. I actually didn’t do that because our car had the possibility to sit on the roof. Once I was on the roof I didn’t want to go back to the confinement of the car. If you can get a guide that’s okay with you being on the roof that’s the best way to go. Bring some pillows so your bum won’t hurt too much at the end of the day.
#2 The Gear to Bring
My set up was 2 cameras with different prime lenses. My Canon DSLR with the 135 mm lens and my Fujifilm mirrorless with the 23 mm lens (the equivalent of 35 mm full frame).
Having 2 cameras in the wild is ideal. Because you don’t lose time changing lenses and you don’t expose your sensor to the omnipresent dust. If you’re shooting with 2 cameras make sure to synchronize the date and time settings. When date and time are the same on both cameras the files will be in the right order once you upload them.
But …. chances are you don’t have 2 cameras.
Camera & Lenses
- You can go for 1 camera with a zoom lens, ask among your friends if you can borrow a second camera or rent a second camera.
- Bring the longest lens you have or don’t be like me and rent a super long lens. If you rent a long lens choose one that starts at 300 mm full frame.
- If you do bring a super long lens or super zoom lens (between 200 mm and 600 mm) don’t bring a tripod. You will most likely not be able to get out of the car to set it up and inside the car, you won’t have space for it. It’s better is to bring a beanbag. You put it in the open window and let your lens rest on it for stabilization. Bring an empty beanbag with you and fill it with rice or beans when you get there.
- If you rent or borrow a camera or lens practice with it before you leave. You don’t want to flip through the manual while you’re on the roof shooting lions!
Memory & Back Up
- You’re gonna be shooting a lot so bring 2 batteries for each camera, their chargers, and a lot of memory. I prefer a memory card with a lot of GB because I don’t like to change cards all the time. I’d rather keep shooting. But do bring a few spare cards in case one misbehaves. You will also need a world plug and a 3-way socket so you can charge multiple devices at once.
- At the end of the day, you’ll need to upload your memory card so you can format the card and start fresh the next day.
- If you’re traveling with your laptop that’s the best way to go of course. Bring an external hard drive to back up immediately.
- Not traveling with your laptop? Then you can use a photo upload and storage device. Google for them and you’ll be overloaded by choice.
- Whatever your method is do it at the end of every day, back up your files and then format your cards.
The Shooting
#3 Be Respectful, Patient & Ready
You are a visitor in their world. You’re supposed to observe only! Never ever interfere with the natural flow of things to get a better shot. So be patient and wait for things to unfold. Observe your surroundings and work with what they give to you.
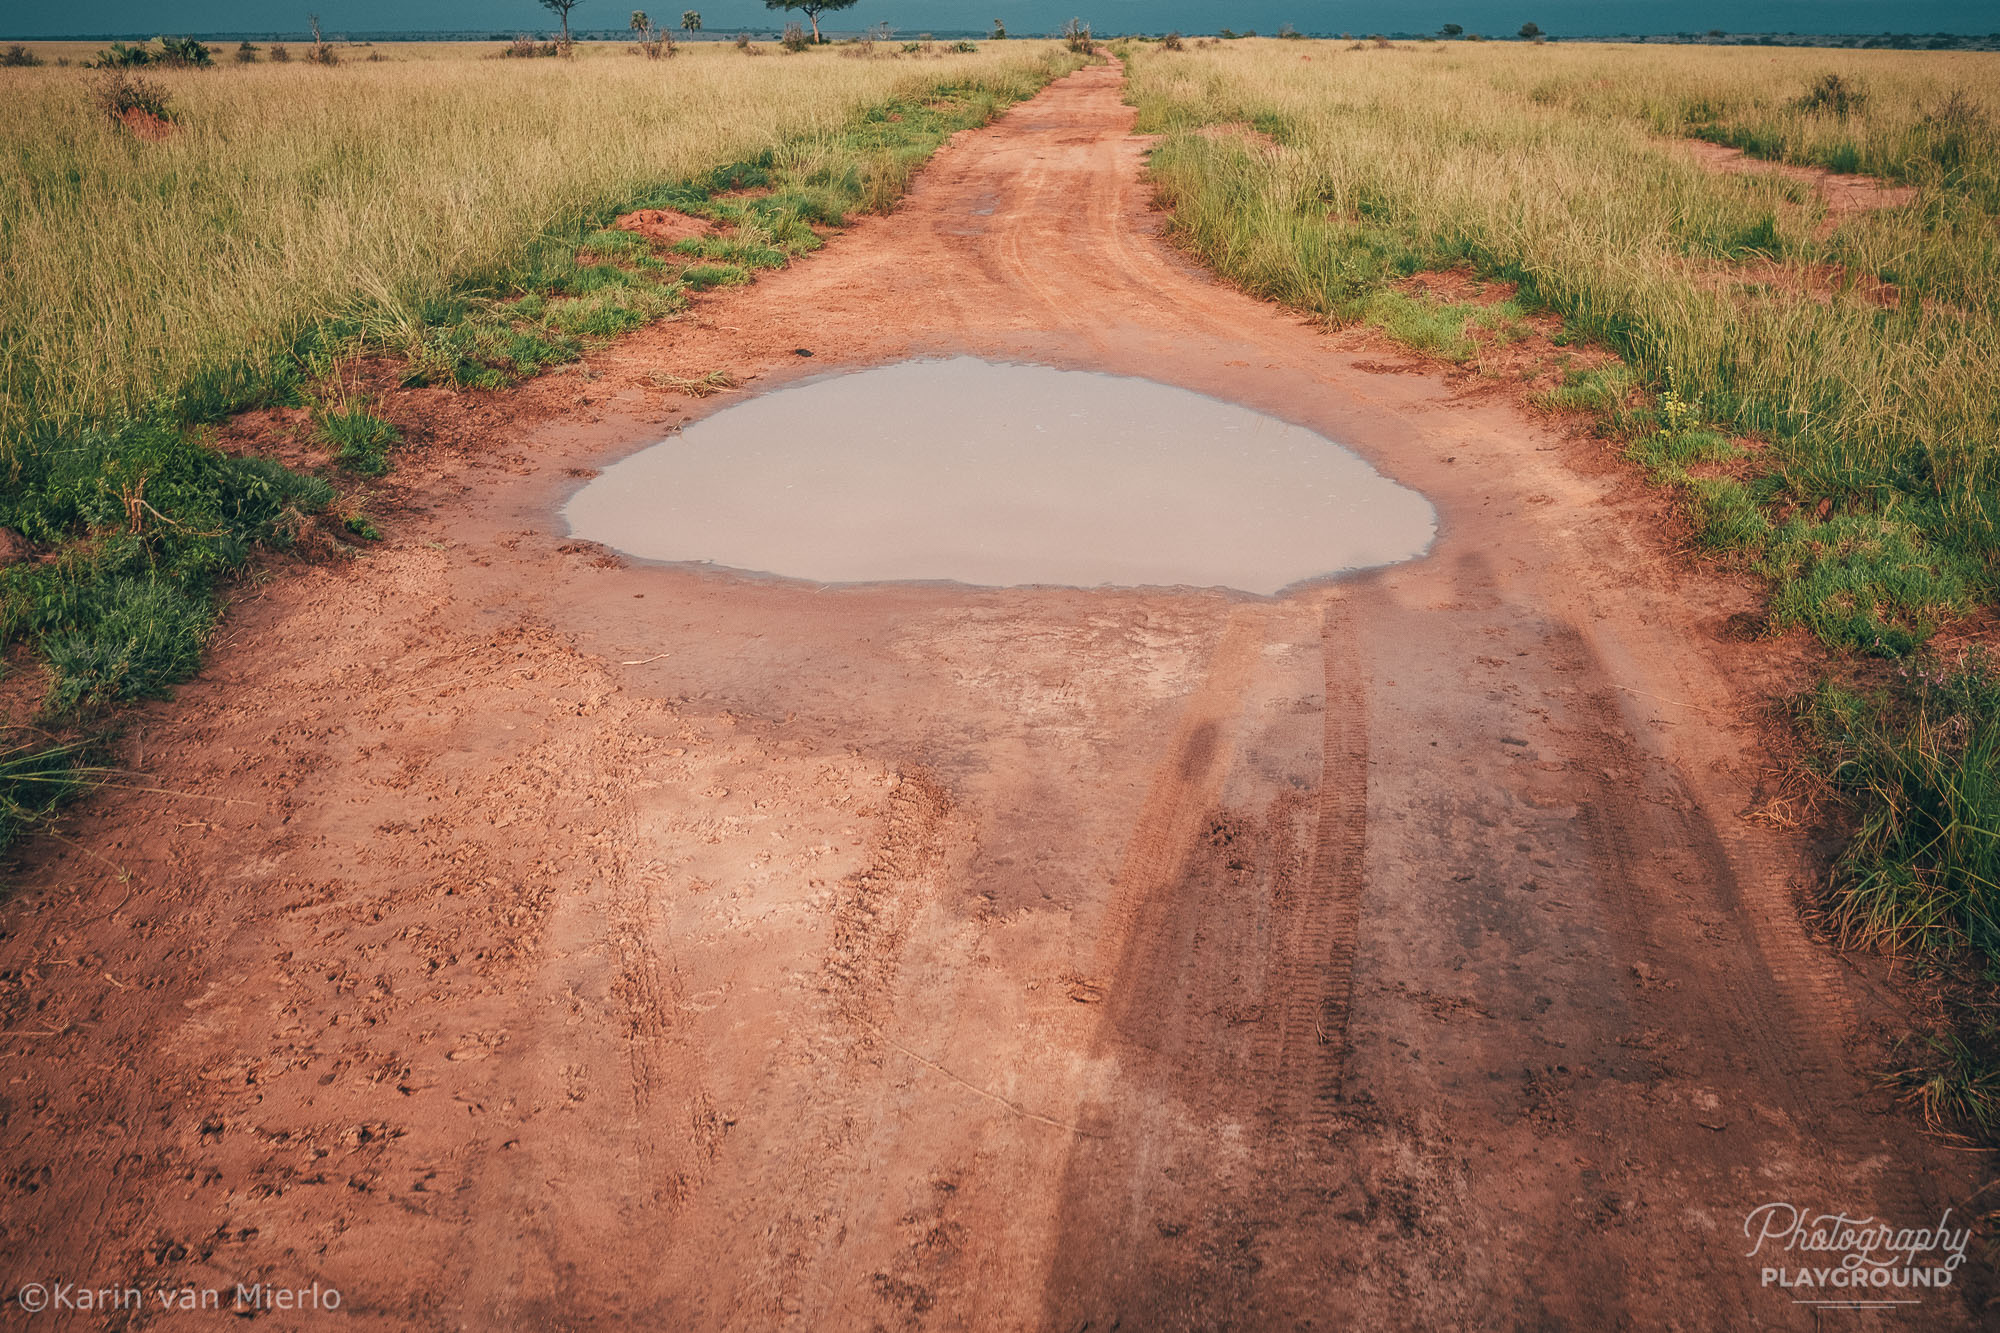
Keep your gear ready in your lap or in your hands all the time. Don’t turn off your camera or put it away if there’s not much going on. You want to be ready for a sudden turn of events and that could be anytime when you’re on a safari. Any moment can be the turning moment when you encounter a lion, witness a flock of birds flying off or a giraffe stretching its neck towards you.
#4 Chase the Light
Yep, I know, an open door in photography. But it’s no different for Safari Photography. The presence of beautiful light can uplift almost any scene. Unfortunately, we’re not in control of the light.
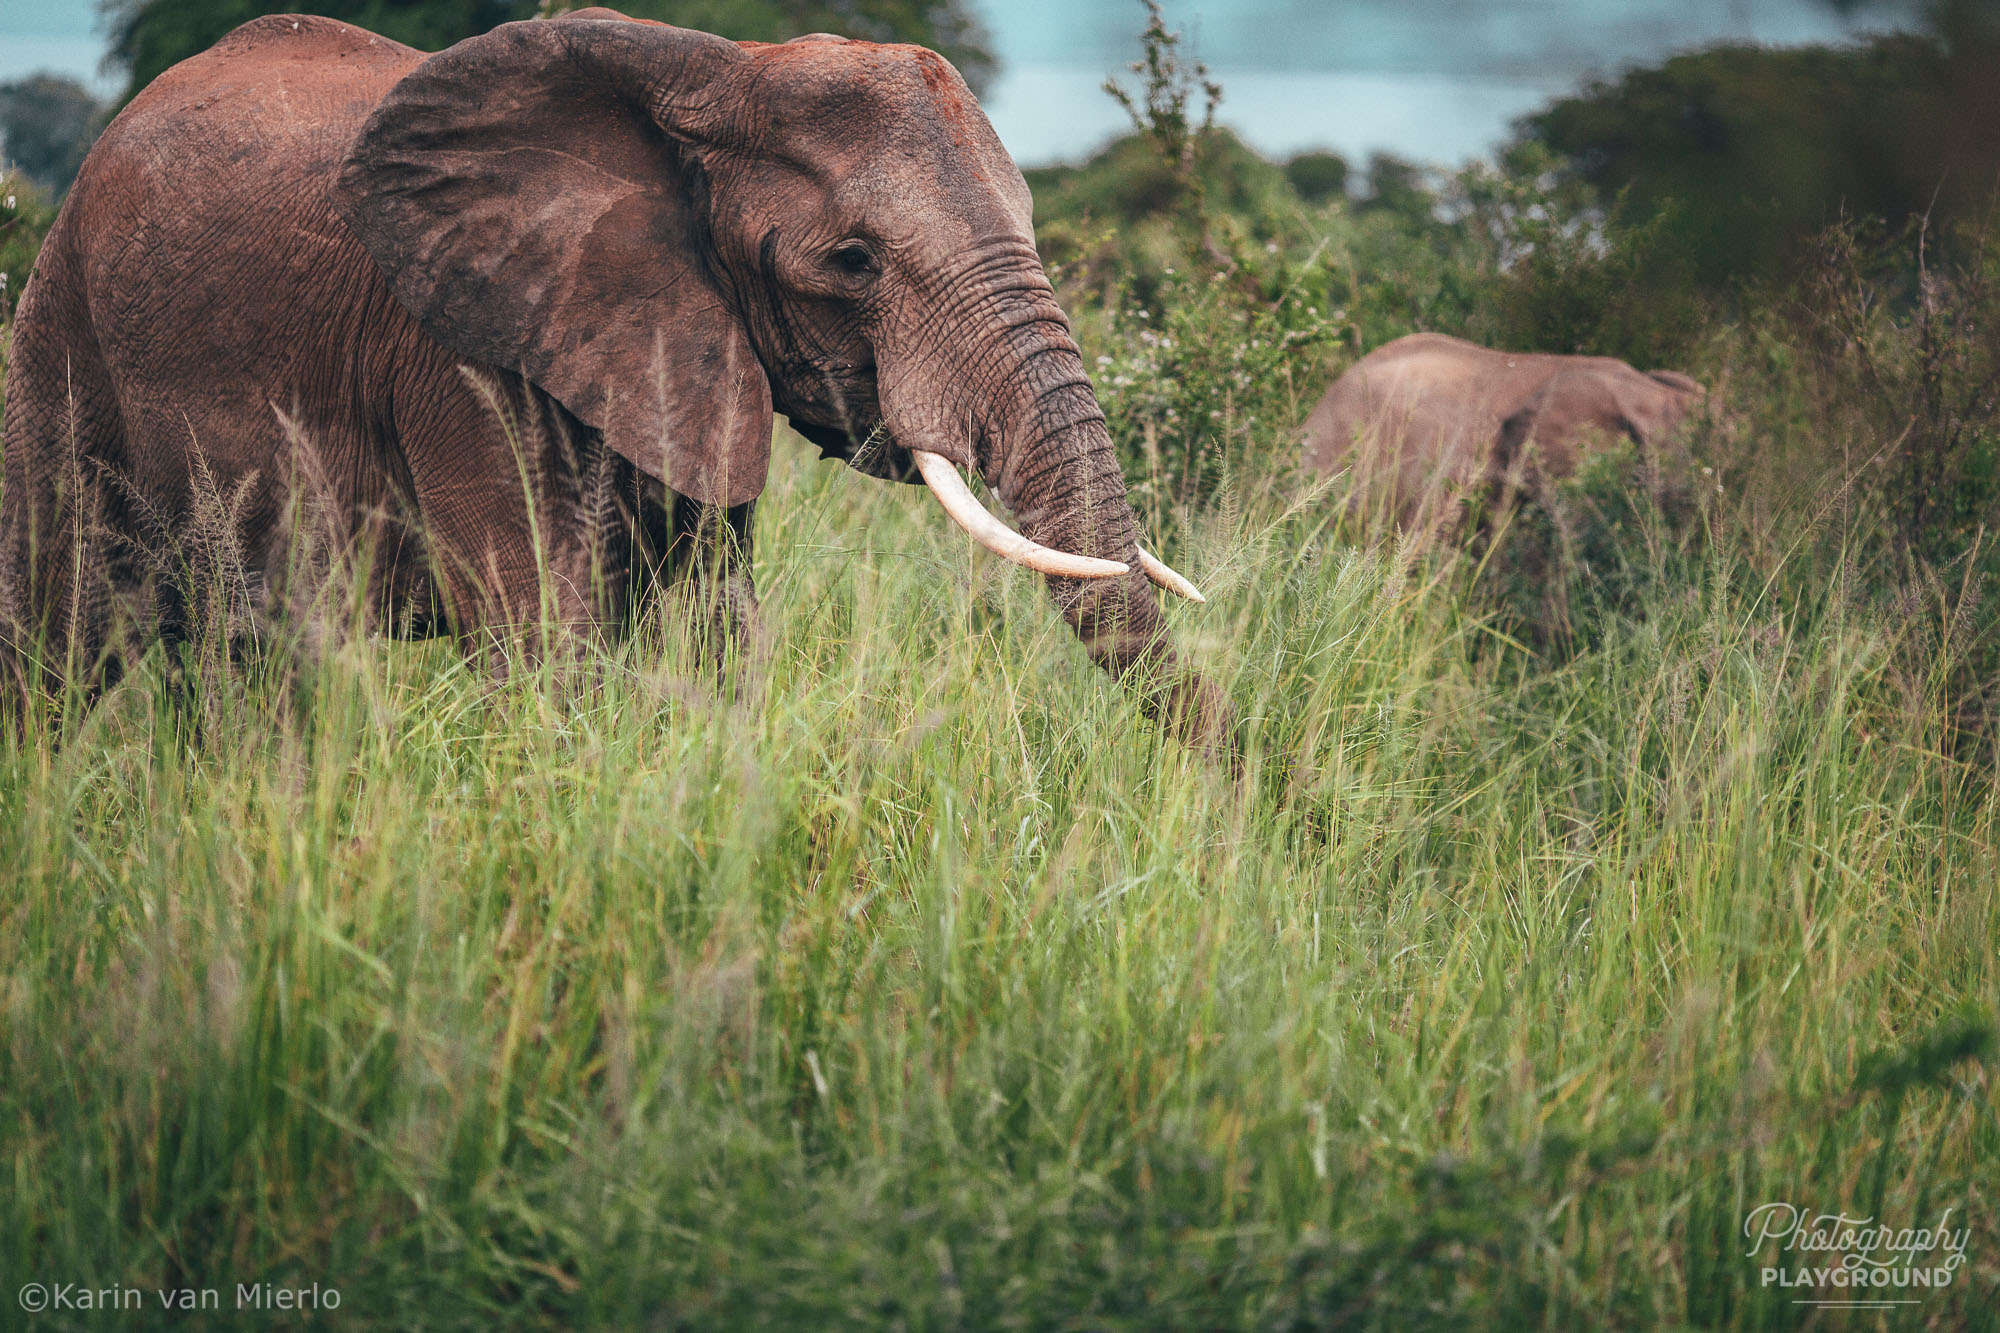
When we were on our safari most of the time the light was flat because the sky was cloudy. But you can still take advantage of the moments the light peeps through the clouds which is what I did.
Usually, your tour guide will offer you an evening game drive and a morning game drive. Because that’s when the animals are most active. It’s also the time when the light is most beautiful and interesting. I actually blocked out the time we had to set our alarm clock (so not a morning person) but it was way before sunrise. When we drove out it was still dark. I’m so happy we did because being a witness of the sun rising over paradise was a majestic sight and feeling. I’ll never forget that AND I have the pictures to always remind me.
Check out this post about sunset photography. The same strategies apply for sunrise photography.
#5 Compensate for the Limitations
The challenging part of shooting a safari is the impossibility of moving around. I’m a very active photographer that needs to walk around. I want to see and photograph the scene from different angles and perspectives. It’s why I wanted to sit on top of the roof because at least up there I had a panoramic view of my surroundings.
But when you’re shooting out of the window your options in perspective are even more limited.
There are a few ways to compensate for this limitation.
- Photograph the same scene with different focal lengths to diversify your shots.
- Pay even more attention to your composition and play with the elements you can adjust.
- The rule of thirds will be your trusted friend thus make use of it whenever you can. In the rule of thirds, you place important elements of the composition at one-third of the frame.
- Check for background and foreground clutter and check the corners of the frame. Anything that’s not adding to the story will be a distraction.
- Look for synchronicities and contrasts. Wait for and anticipate the moment things fall into place. Try to capture the moments of interaction and connection between the animals.
- Take pictures that tell little stories of your experience, your emotion, the people you’re with, the breathtaking landscapes and the overwhelming beauty.
#7 Best Camera Settings
Don’t strive for technical perfection and manage your own expectations. You’re not a wildlife photographer. The gear and experience of the best wildlife photographers out there are insane compared to what you bring to the table. Instead, focus on having an awesome adventure with your travel companions. Shoot as much as you like but don’t expect to photograph the next wildlife photo of the year.
However, to get the best out of the gear you have it’s important to pay attention to some settings of your camera.
- Let’s start with the quality of your files. If you’re familiar with shooting in RAW, set your camera on RAW (you know why). If you’re not familiar with shooting in RAW set the file quality on the highest quality in Jpeg or the Raw + Jpeg option.
- I recommend setting your focus mode on continuous and the number of images per second on multiple. When you’re shooting a moving animal you’ll need both. When you’re photographing moving animals shoot a lot. Keep your finger on the shutter and don’t stop until the moment is gone. Photograph through the moment so to speak.
- The third piece of advice is to set a fast shutter speed. Again because of the moving animals but also when you’re photographing from the moving car. Of course, you can wait for the car to stop but why limit yourself to those moments. I kept on shooting even while we were driving. The trick to getting sharp pictures in both scenarios is to shoot with a very fast shutter speed. Anything above 1/1000 sec will do fine.
Still photographing in auto mode? Go here to find out more about shooting in manual mode and to get the shooting in program mode guide.
The Hardest Part
#7 Kill 90 percent of what you shot
You come home with hundreds of pictures you took during your wildlife adventure. Because of the nature of shooting an African Safari, it’s more than likely you have a lot of almost identical photos.
Let me tell you a little secret. Nobody wants to see 27 pictures of the same moment. You’ll bore your friends and family to death and they will never want to see another picture you took. You have to be relentless in your culling to prevent that worst-case scenario from happening!
During our evening and morning game drive, I took about 900 pictures. From those 900 files, only 80 were left after the culling process. That’s how ruthless you need to be! Trust me when you do this your people will wait in line whenever you come back from an adventure. Because they can’t wait to see your pictures.
When you have your ‘fit for other humans’ selection ready you can edit your photos in Lightroom or any other photo editing software you’re familiar with to give them that extra push to greatness. Create a slideshow or have the pictures printed to show them to your family and friends.
Go here to learn about how to make a travel photo album of this awesome adventure!
Last but not least, enjoy and savor every second of it. It is truly a once-in-a-lifetime experience.
Have you ever been on an African Safari? Tell me about it in the comments!
Did you try one of the tips? Share your photos on Instagram and mention @photography_playground!


hi Karin.
Very good infos.
I m going one week safari in Kenya.
should I be ok with my old 130 mm Nikon f2.8.
best regards Patrick.
Hi Patrick, thank you 🙂 A 130 mm will be fine. Enjoy!
I have been to Kenya and Tanzania 3 times and had fun photographing the wild animals. The first two companies I used to travel I liked best for where we went, stopped, spent times like you said and had a good driver/informer.
Your info was interesting and learning about lenses.
Hi Sue, that sounds amazing! Glad you liked the article.