
10% off luminar neo
I’ve partnered with the people at Luminar Neo to get you a special deal. When you apply the coupon code PP10NEO at checkout, you’ll get a generous 10% discount!
Your Images, Your Way
You love photography and have a treasure trove of images on your computer or hard drive.
But you’re not always sure what to do with them. Editing seems like the obvious next step, but free editing software often seems clunky, and, well, let’s face it, not all of you can justify the annual cost of Adobe Lightroom.
So what do you do with your treasured photo collection? Let them languish on your computer? No, you want them to shine, to tell stories, to evoke emotion.
That’s what photos are meant to do. Of course, creating them is great, but photos love to be shared with the world. And to do that, you need an infrastructure.
In this Luminar Neo review, we’re going to discover together if Luminar Neo is the infrastructure for you!
Luminar Neo vs Lightroom
So let’s start with the obvious question for a Skylum Luminar Neo review. How does the latest version of Luminar Neo compare to Lightroom?
That’s a little hard for me to say. I’ve been using Lightroom pretty much since its inception. So the tool has no secrets for me, there is nothing to figure out.
I also love Lightroom. It has always been an integral part of my photographic process. No image ever sees the light of day without going through Lightroom. Of course, this is also important because I always shoot raw. And raw files always need post-processing.
Find out why shooting in raw is important: Raw vs Jpeg: 9 Irresistible Reasons To Shoot in Raw
I’m telling you this to make it clear where my alliance lies :-), especially since Lightroom has been adding more and more AI-powered tools to the software lately.
On its Own Merits
Although I set out to be open-minded in my Luminar Neo review, I found myself being quick to judge while using Luminar and things didn’t work as I expected.
I soon realized that if I wanted to give Luminar Neo a fair chance and write an honest Luminar Neo review, I needed to look at it from a new perspective. I needed to review it on its own merits and not how it compares to Lightroom or Photoshop.
It’s a tool in its own right, designed with a different goal and a different audience in mind. So let’s look at it that way.
And I’m happy to say, that after my initial hesitation and doubt, I enjoyed image editing with Luminar Neo and ended up embracing it for what it is.
What is Luminar Neo and Who is it for?
It is a very smart, easy-to-use tool for beginners and advanced photographers that takes the overwhelm out of editing by using AI.
User-Friendly Interface
It has a user-friendly interface that makes editing easy, especially for newbies. It guides you – the budding photographer – smoothly through the editing process, making sure you’re in control every step of the way.
AI-Powered Tools for Easy Enhancements
Luminar Neo shines with AI-powered tools that quickly enhance images. I was able to enhance a photo in just one click using Luminar Neo’s AI-powered tools.
One of the things I hear from my students is that technical overwhelm is a real thing, both when it comes to using your camera and editing your images.
That’s why it’s so great that Luminar Neo’s AI-powered tools offer the new photographer quick and easy improvements that make you feel confident and motivated to edit the next image…and the next…and the next.
Creative Tools to Find Your Voice
Because Luminar Neo offers non-destructive editing – just like Lightroom – you can experiment to your heart’s content. Any creative exploration is reversible with a single click, allowing you to try a new approach.
Luminar Neo offers a wide variety of creative tools for endless inspiration that will keep you exploring. I encourage you to dive deep into this exploration because it allows you to easily discover your preferences and find your voice.

10% off luminar neo
I’ve partnered with the people at Luminar Neo to get you a special deal. When you apply the coupon code PP10NEO at checkout, you’ll get a generous 10% discount!
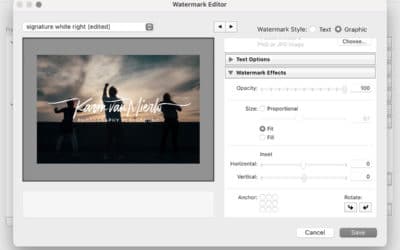
Lightroom Integration
For the Lightroom addicts, it comes with a feature that I know I will definitely use. It integrates with Lightroom and Photoshop. This allows you to do your Lightroom or Photoshop edits the way you’re used to, then open the file in Luminar Neo and apply some AI magic like Noiseless or Supersharp.
Just so you know, some features like Supersharp are add-ons that you have to pay for. But I’d say they’re well worth the investment. Other extensions are Magic Light and Noiseless for AI-powered noise reduction.
I especially like the Supersharp extension because sometimes it’s just unavoidable and I’ve missed the optimal focus, resulting in a soft look. Supersharp is an AI tool that can help you remove the softness and create a sharp, crisp image.
To be clear, this isn’t something you should rely on when photographing.
The best way to get a sharp photo is still to get it right in-camera, but sometimes it just doesn’t happen in-camera and that’s when we have AI to help us out.
Discover the steps to sharp photos: 8 Critical Steps to Get Tack Sharp Photos

The Ethics of AI in Photography
An obvious concern that might pop into your head – I can assure you it popped into mine and hasn’t left since – is the ethics of using artificial intelligence in photography.
Integrating AI-powered tools into the photographic workflow opens up new possibilities for creativity and convenience, but it also raises concerns.
Rather than go down the rabbit hole of philosophical and theoretical discourse, I’d like to keep it very practical, because that’s where it’s ultimately going to play out.
In this Luminar Neo review, I wanna take a look at two specific areas where I think ethical concerns arise: replacing the sky and body enhancement.
Sky Replacement
I’m very reluctant to use this tool, to be honest. I can clearly see its appeal. Who doesn’t want to add a little drama to a boring sky? It’s a matter of seconds and boom…there’s drama. Really, it works wonders.
I think it’s one of those tools that allows you to play around, get creative, and have a lot of fun. You should definitely do that, especially if the images are for personal use. And that’s the keyword, I’d say… personal.
If you’re submitting this photo to a contest, exhibition, publication, or any other form of presenting your photos to an audience, you should be transparent and disclose the sky replacement.
When replacing a sky, always consider the ethics and find a balance between your creative expression and the authenticity and emotion of the original scene.


Body Shape Enhancement
Let’s just say that when it comes to changing body shapes, I’m super clear. I have never and will never change the shape of anyone’s body or face. Not even a little bit. That is my personal feeling.
I suppose in the society we live in today, small changes might be acceptable, but changing bodies to an extreme degree has harmful effects.
We should tread very carefully here. As soon as the mouse hovers over the Abdomen slider, we’re taking on a responsibility to the person whose body shape we’re changing. Think about the message you’re sending.
Let’s Promote Authenticity!
I also urge you to consider the broader societal implications of promoting an idealized perfection that doesn’t exist. Why not promote authenticity instead?
Don’t get me wrong, this is not a crusade against Luminar Neo. They were not the first to offer such a tool.
I just want to encourage you to be cautious. Just because it’s available doesn’t mean you should use it.
I’ll close the ethical considerations in this Luminar Neo review with a few guidelines.
Ethical Editing Guidelines
Transparency: Once your AI-altered image reaches a wider audience, or if accuracy is important, disclose the changes you made to the image.
Authenticity: Preserve the authenticity and integrity of the original scene as much as possible. This is especially important in genres such as documentary, storytelling, portrait, travel, etc.
Mindfulness: Be mindful of the changes you’re considering. Is it really necessary? Try to avoid changes that promote perfection.
Ethical editing is about balancing your creative expression with the authenticity and integrity of the scene as you found it.
Now that that’s out of the way and we’re on the same page when it comes to ethical editing, let’s shift our focus in this Luminar Neo review to its impressive array of editing tools designed to take your images to the next level.
A Luminar Neo Review wouldn’t be complete without giving you at least a basic understanding of how to work with it. Let’s have a look at the interface once you’ve purchased your copy of Luminar Neo.
10% off luminar neo
I’ve partnered with the people at Luminar Neo to get you a special deal. When you apply the coupon code PP10NEO at checkout, you’ll get a generous 10% discount!
Get Organized in Catalog
The first tab we’ll discuss in this Luminar Neo review is the Catalog tab. This is where you organize your files.
You’ll see a bunch of folders on the left, but the most important thing here is the big Add Photos button at the top. This is because you need to populate Luminar Neo with your photos before you can start working with them.
So you’ll need to create a catalog of your files.

Before you do that, go to the folders on your computer or external hard drive and take a good look at them. How are they organized? Is it clear, is there a system, are you confident that you can find what you’re looking for quickly?
If not, now is the perfect time to set up a new and improved organization system! And you know the thing about systems, right? They only work if you stick to them consistently 🙂 It doesn’t really matter what kind of system you choose, just use it consistently.
Okay, happy with your system? Hit the Add Photos button! Alternatively, click the plus icon next to the Folders tab. You can decide if you want to add your entire catalog of files or maybe just a few folders to start with.
Virtual Folders
While you’re waiting for your files to be added, let me explain how this actually works in Luminar Neo. Your photos aren’t actually imported into Luminar Neo. The application creates a shortcut to the folder and generates previews.
Right-clicking on a folder brings up a new menu where you can rename the folder, add more files, create subfolders, etc.
One thing to note is that what happens to folders in Luminar Neo also happens to your folders on your computer or hard drive, and vice versa. This is very important to be aware of!
The two systems – the virtual folders in Luminar Neo and the real files in your folders on your computer or external hard drive – mirror each other. Whatever you do in Luminar Neo is reflected in your real folder. Likewise, whatever you do in the folders on your computer or external hard drive is mirrored in the virtual catalog in Luminar Neo.
This includes renaming and moving folders and files, as well as adding and deleting files. So be aware of this. To keep your files safe, they have built-in a step to delete them only in Luminar Neo for a period of time. Always choose this option if you’re not sure.
Selecting and Collecting
There are two important things a catalog like this should be able to do, and Luminar Neo does both.
Number 1 is that it should allow you to select the photos you like and want to edit.
Number 2 is that it should allow you to create folders with groups of photos from different locations, usually around a common theme.
Selection Process
Let’s start with the Selection process. You can access this by right-clicking on the file and selecting Set Flag. You can also simply select the file and assign a label using a keyboard shortcut.

There are basically three types of labels you can assign to your files Favorite (keyboard shortcut P), Rejected (keyboard shortcut X), and Unmarked (keyboard shortcut U). All files start as unmarked. This system is not as granular as Lightroom’s, it’s a simple yes or no option. Of course, you can assign a Maybe to the Unmarked option.
Once you’re done you can select the Favorites by clicking on the top at Showing: All Photos and clicking Favorites.
Creating Albums
Albums is where you collect files from different folders. Click on the Plus Icon next to Albums and give your Album a name. Then you can simply drag and drop the photos you want from the various folders into the Album.

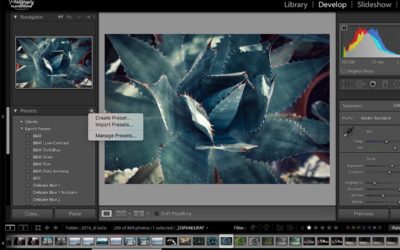
Get Started in Presets
The next tab in the workflow is Luminar Presets, which is basically the filters section. I won’t spend much time here. Just check them all out. There are tons to choose from.
The important thing about presets or filters is that you should be able to adjust the strength of the preset/filter. And Luminar Neo lets you do just that.
Luminar presets are organized by theme and style, making it easier to choose a preset without feeling overwhelmed.
You can create a favorites list. And when you hover over a preset, you can preview the effect. You can also create your own presets, which will live here alongside the Luminar Neo presets.
A preset can be a great starting point. Once you’ve applied the preset, you can further edit the file in the Edit tab.

10% off luminar neo
I’ve partnered with the people at Luminar Neo to get you a special deal. When you apply the coupon code PP10NEO at checkout, you’ll get a generous 10% discount!
Get Creative in Edit
So, the next step is editing. This is what it’s all about. This is where the rubber meets the road. Everything else is fluff, important fluff, but fluff nonetheless.
I was most curious to see how Luminar Neo would perform when it came to editing my images. What is it capable of? I’ll answer that question in a minute, but first, let me give you a quick overview of all the tools in the Edit panel and how they’re organized.
By the way, each tool has a little information icon and if you click on it, you’ll be taken to a web page with an explanation of the tool. I think that’s very nice and helpful, especially for beginners.
The editing menu is on the right and is divided into a few sections, the most important being Essentials, Creative, and Portrait.
Tools & Edits Tabs
At the very top, you can see 2 tabs: Tools and Edits. Once you’ve done some work in a tool and closed it, that edit lives under the Edits tab.
This is important to be aware of because if you reopen the same tool in the Tools tab, you cannot adjust the edits you have already made. You can, however, do that in the Edits tab. You can also delete an edit in the Edits tab if you’re not happy with it.
Most tools allow you to create a mask from within the tool, which is pretty cool.


Essentials
Essentials is where you’ll find all the …. yep essentials.
It is usually where you start your editing journey. Open Develop (from Essentials) and you have most of the editing tools you need at your fingertips.
This is where you’ll find the Erase tool, and Landscape is also worth mentioning.

Creative
In the Creative menu, you’ll find tools like Relight and Sunrays – both of which I’ll take a closer look at in this Luminar Neo review. There are also tools to add mystery, glow, and a bit of fog or grain. When you open Mood, you’ll find a bunch of Luts, which are basically filters. Play around with them, it’s fun.
Portrait
The Portrait menu is pretty awesome for portrait photography – as long as you stay away from the tools that change the shape of the body because, as we discussed earlier, of the ethical implications.
But there’s a lot of other super fun stuff to do in the Portrait section. I went all out, so read on to find out what it can do!
Make Your Images Come Alive
Now that you’ve got the basics down, let’s explore! In terms of editing, I wanted to answer a few questions in this Luminar Neo review:
How easy is it for a complete editing novice to get a well-edited image in just a few clicks using AI?
How does Luminar Neo perform without AI? By just using the editing tools that don’t involve AI, like exposure, color, contrast, etc.
What’s the performance of the various built-in AI tools? Are they able to produce a natural look, or is it clear that AI was used?
Will you come with me and dive into the wonderful world of making your images come alive? Then let’s go!

Preset & Enhance
I’ll start by answering the first question: Is it possible to make a good-looking photo with AI in just a few clicks?
To do this, we’ll use a photo I recently took in the Monkey Forest in Ubud.
My first step was to go to Presets to see if that would quickly add a sparkle to the image. I decided on the Clear and Sharp preset from the Scenery Collection. I didn’t adjust the filter strength in this case, but you could if you wanted to.


Then I opened the Edit tab and clicked on Enhance – the one-click way to make your image look better instantly. You can adjust the strength of the tool. I chose to go all the way and set the slider to around 50%. If there’s a sky in the image, you can enhance the sky separately.
That was it. In just two quick and easy steps, I was able to bring this image to life.
I think that is the power of Luminar Neo. For the photographer who doesn’t need or want to spend hours behind a computer, they provide an excellent and accessible solution.
And as we’ll see next, they also deliver for the photographer who loves to edit and tinker until it’s just right.
10% off luminar neo
I’ve partnered with the people at Luminar Neo to get you a special deal. When you apply the coupon code PP10NEO at checkout, you’ll get a generous 10% discount!
Old School Dodging & Burning
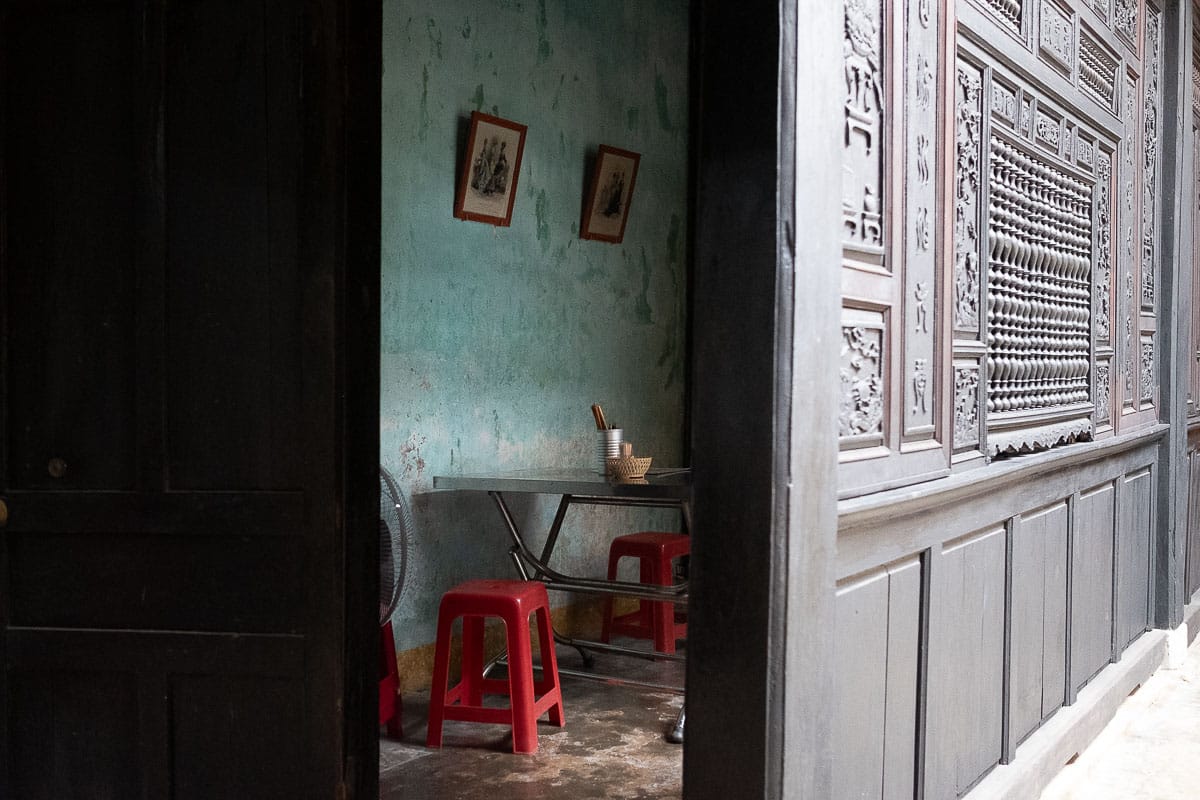
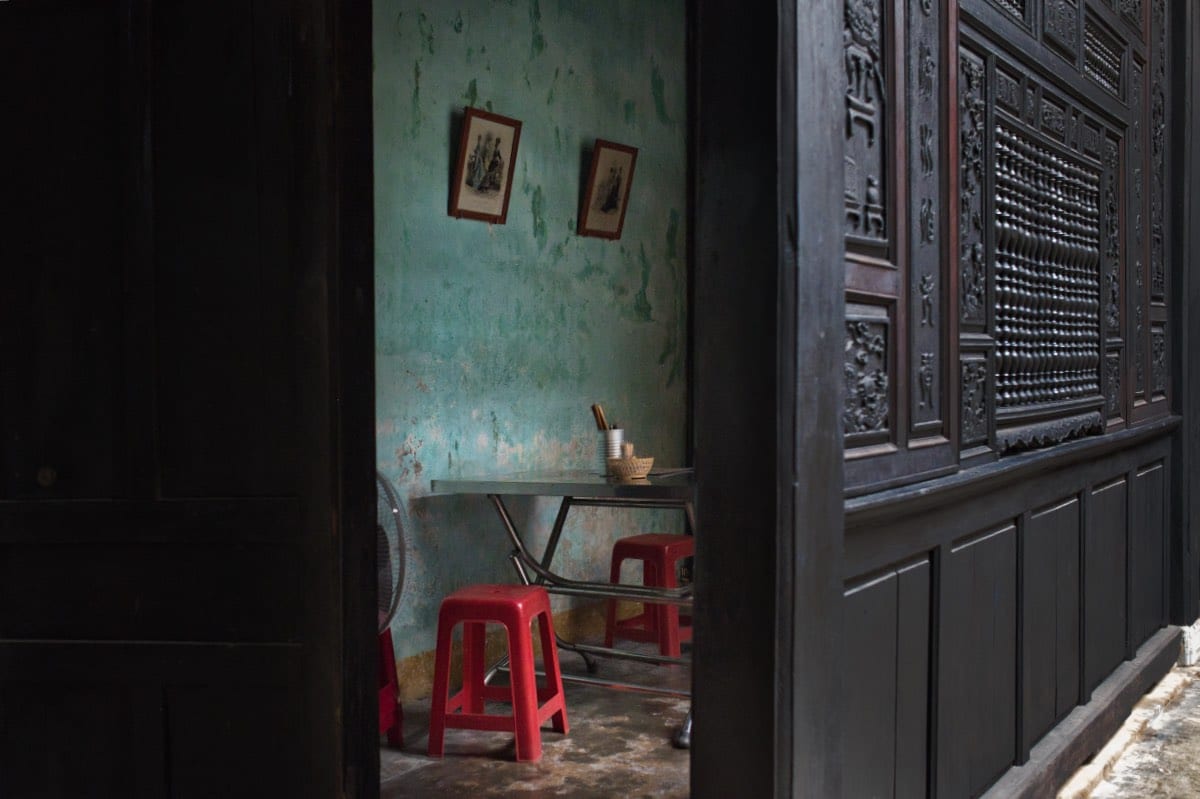
The next thing I wanted to investigate was how it performs without the AI-powered tools. We’ll use a photo of an old Chinese house in Hoi An, Vietnam. It’s a beautiful house with a lot of dark wood carvings that create large contrasts with the lighter areas.
So that was the main thing I wanted to work on in this image, to reduce the contrast to bring out the details of the wood while keeping the brightness of the room inside.
Aside from the usual tools like Develop, Vignette, and Color, I used Dodge and Burn to bring the two contrasting areas together. And as you can see, it did a great job. You can find the Dodge and Burn tool under the Professional tab if you scroll all the way down.
Dodge & Burn?
And for those of you who have no idea what Dodge and Burn is, let me explain! The Dodge and Burn tool allows you to adjust the exposure of a specific area of the image.
Burn means to make the area darker and Dodge means to make the area brighter.
These are old terms from the darkroom days when we used to dodge and burn with actual pieces of paper or holes we cut out of a piece of cardboard. Now we just move the mouse over an area and it’s done 🙂
Looking at the results of these edits, I’d say Luminar Neo passed this test with flying colors.
The Power of AI
On to the AI-powered tools. There are quite a few, and I won’t cover all of them. Just a few that I think you might find helpful.
The AI tools I’m going to discuss fall into 2 categories. Removing stuff and adding stuff.
We’ll start with removing stuff.
The Magic of Erase
The first one is Erase. Now there’s a nifty little tool that I immediately fell in love with.
The main reason is that it can erase all those annoying dust particles that mysteriously ended up in your file with one simple click. How amazing! Do you know how much time this will save you?
Read More: 5 Easy Steps to Quick & Safe Camera Sensor Cleaning

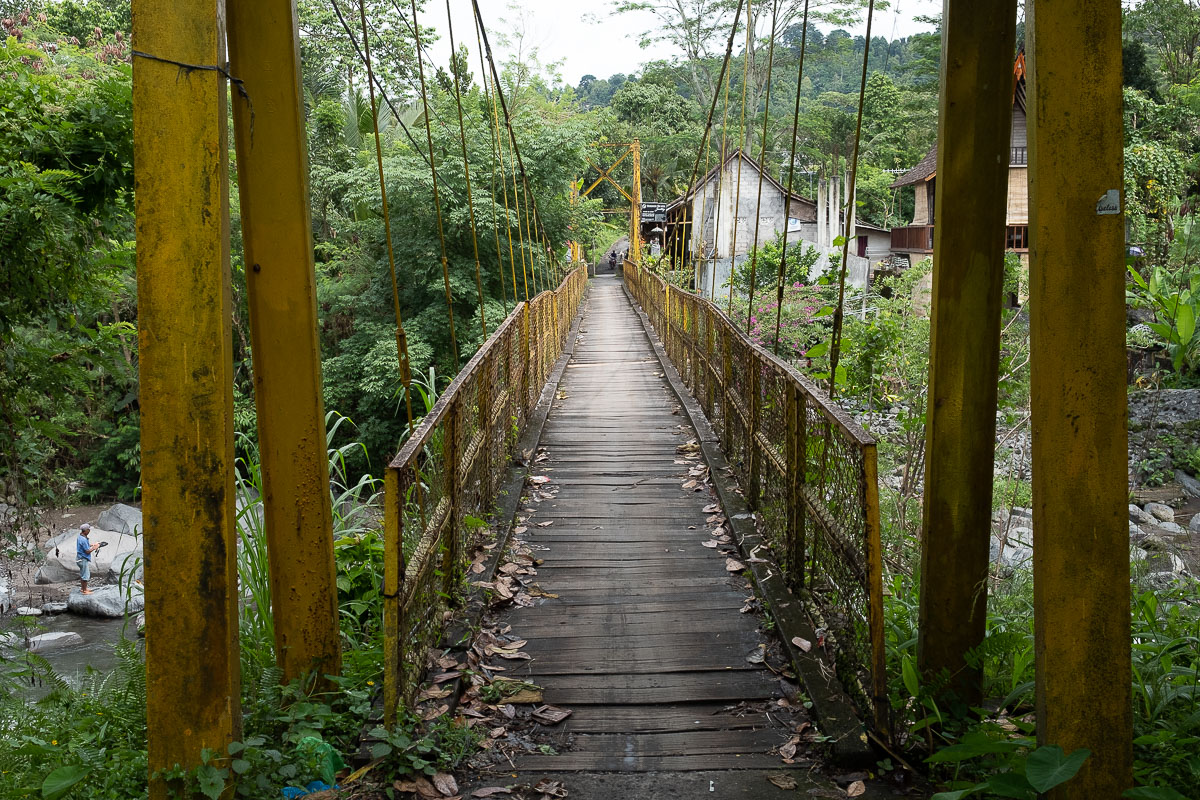
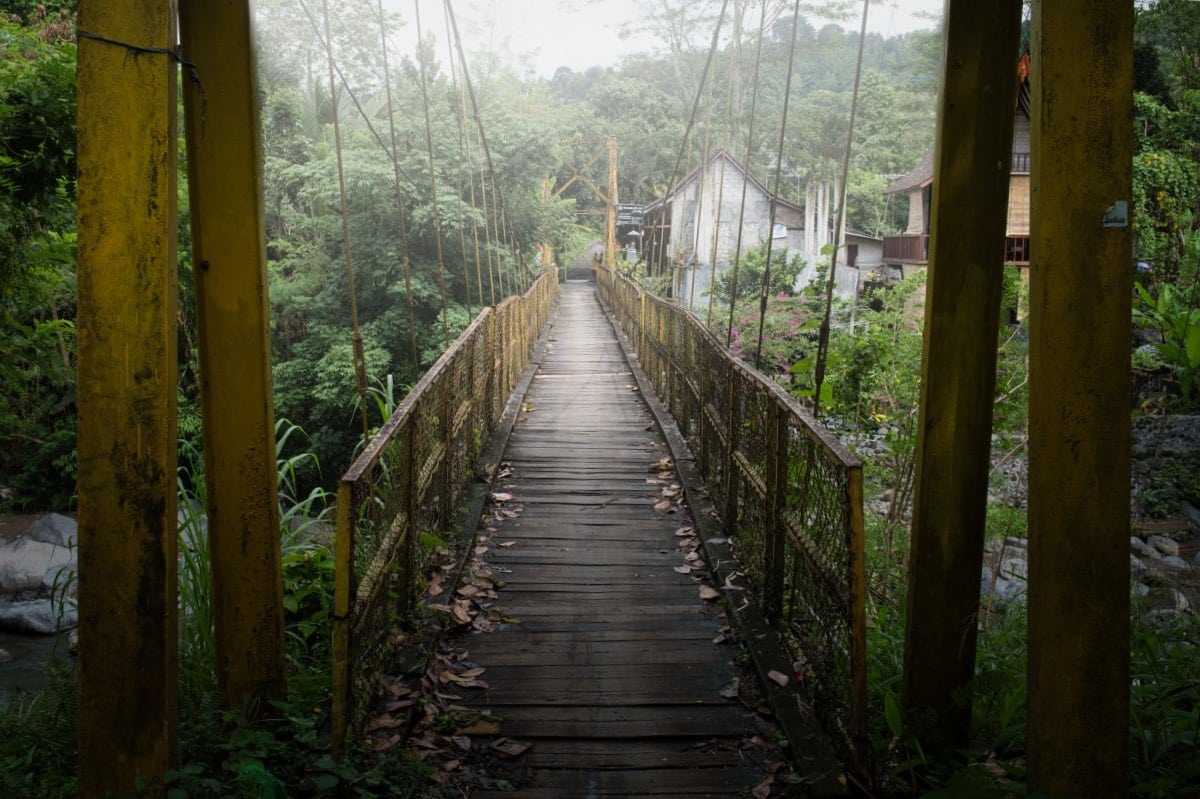
Erase Powerlines
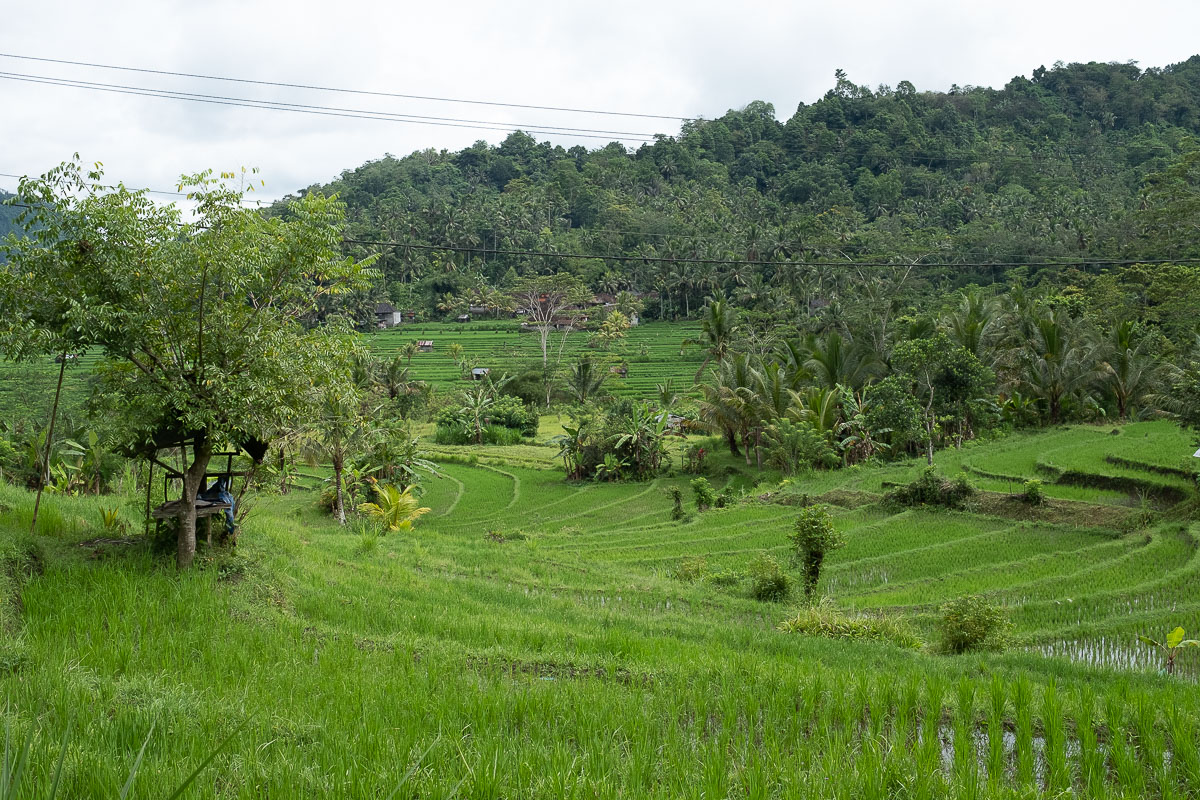
And then there’s Erase Powerlines. Wow. To be honest, this is a tool I didn’t know I needed. I never felt the need to erase the power lines because, well, they were there – remember the authenticity and integrity of the original scene?
But I think there are scenes and situations where it’s perfectly fine to erase a few annoying power lines while still honoring the integrity of the scene.
Like in this picture. There was no way I could have made it without the power lines, but they bothered me.
They distracted from the beauty and serenity of this beautiful rice field in Sidemen, Bali. So I got rid of them 😉
And Luminar Neo did a perfect job in no time. I only had to adjust a few small areas where it didn’t get the power lines, but that was also done in seconds.
Let’s move on to the next category, adding stuff.
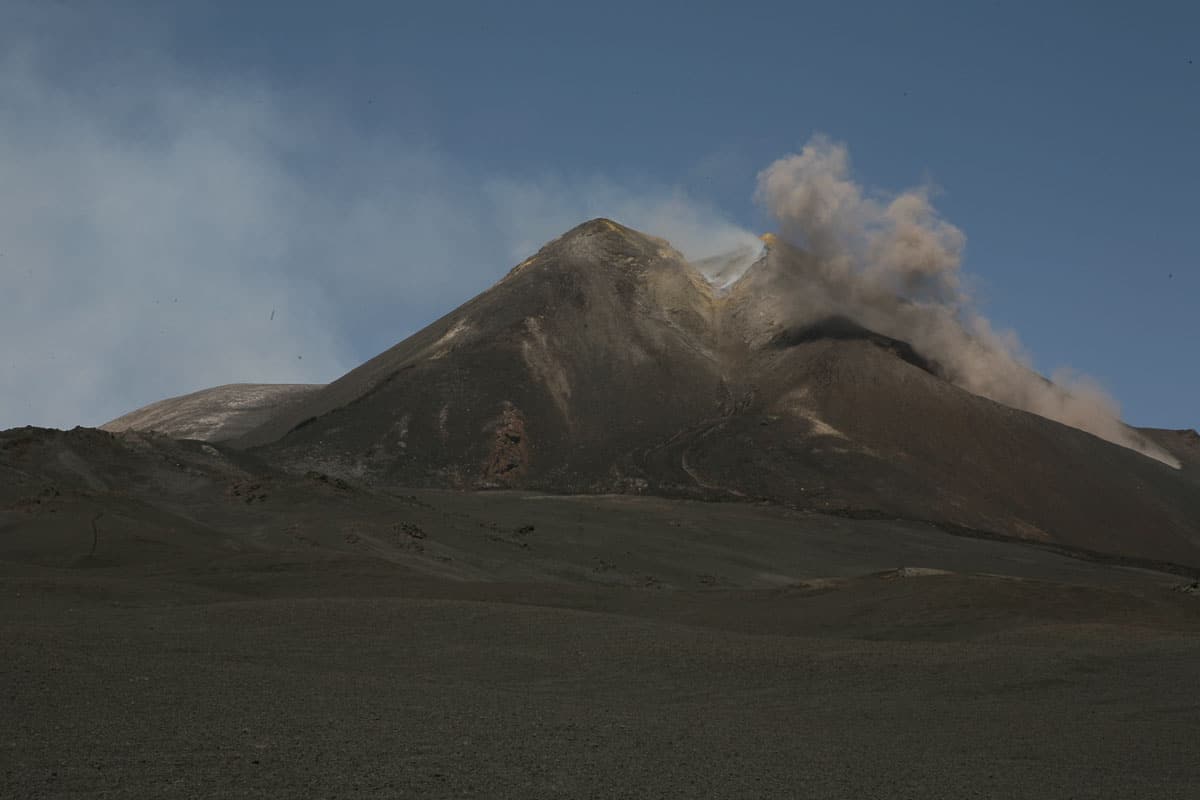
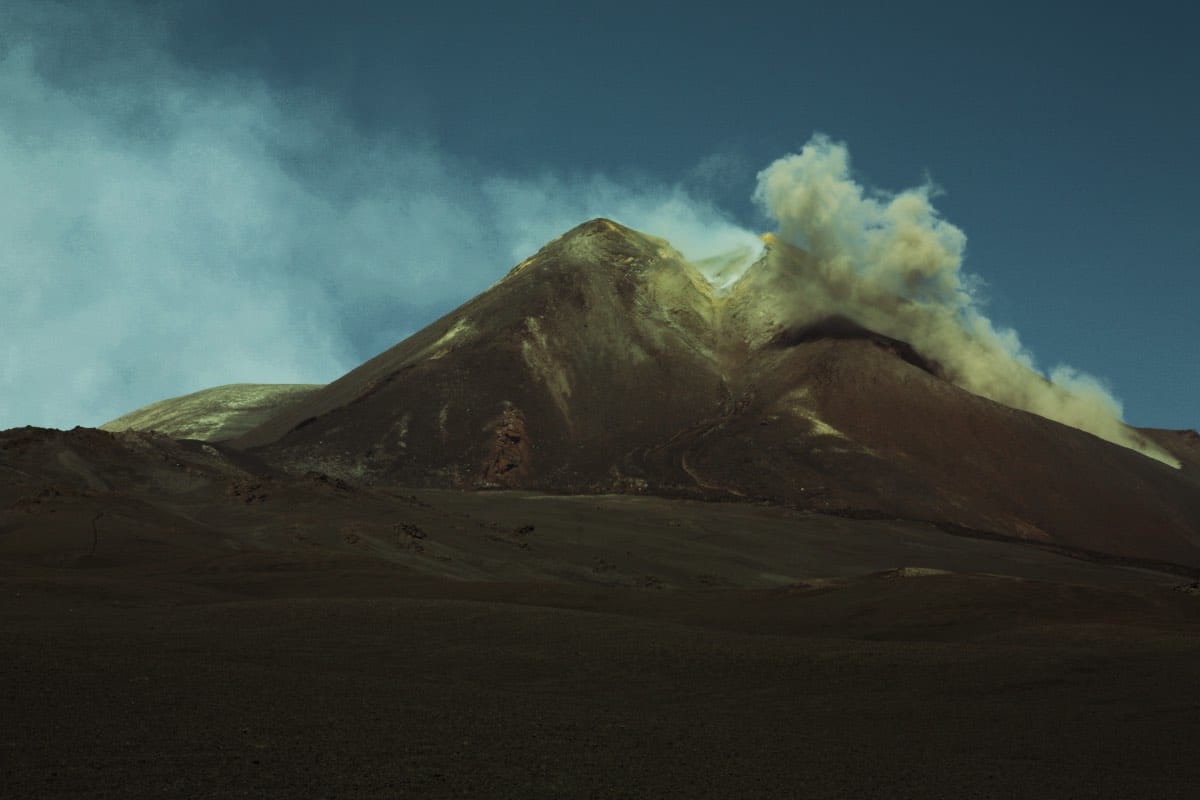
Sky Replacement
The most juicy one is of course adding a completely different sky. I don’t know about you, but I’ve had it many times when I was out photographing and the sky was just boring, all gray and flat. No light, no clouds, no detail.
I always try to make the image interesting in a different way, using all the photographic tools at my disposal. And that is usually enough for me. I’m leaning more towards honoring the authentic sense of place when it comes to the big things like the sky. Erasing a few powerlines is already a big step for me 😉

But you should find your own balance and which way you’re leaning. So if you want to spice up your images by replacing the sky, go for it! Luminar Neo will be your best friend because it does it really well.
You can choose from different moods, times of day, clouds, etc. And you can adjust the position, the light in the other areas, etc.
Remember to make it look as natural as possible. So pay close attention to the foreground and the kind of sky that fits well with the rest of the frame.
Add a Little Sunshine
The next tool is Add Sunrays. I chose a photo that already had part of the sun in the frame so I could place the center of the sun there. I think Luminar Neo does a wonderful job of enlivening this photo and making it look warm and sunny.
By making these adjustments and adding a few rays of sunlight, the photo actually represents the feel, look, and mood of the original scene much better than the raw photo without any edits.
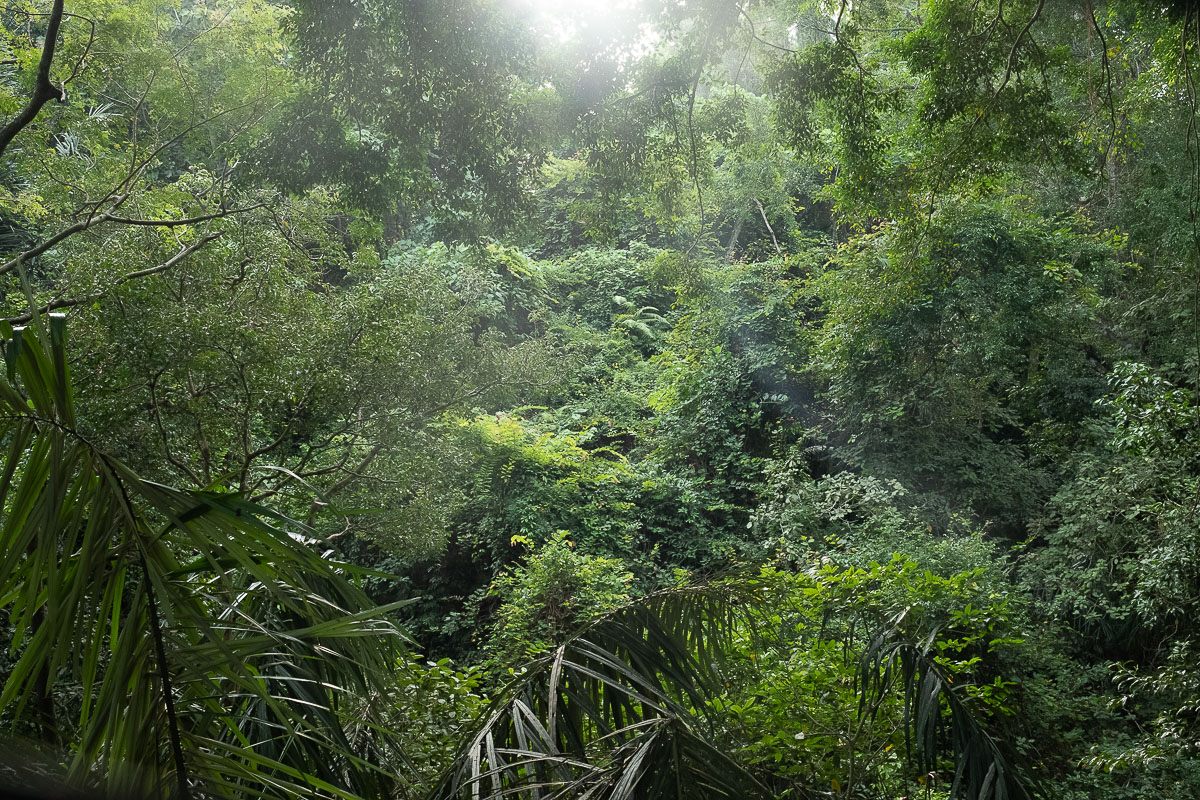
While photographing, I actually made sure that the details in the trees were well exposed. That’s why the sun looks so washed out. I wanted to test the Sunrays tool for my Luminar Neo review.
Knowing ahead of time that I’d be able to recreate what it looked like without sacrificing detail in the darker areas is actually kind of cool.
Creating Awesome Portraits
The last tool I’d like to discuss is the Portrait section and more specifically the Portrait Bokeh tool.
Here you’ll find a lot of options to enhance your portraits and I invite you to try them all. Yes, even the Body Shape tool. But be brave and use your own body!
The Portrait menu is pretty awesome because it allows you to be quite granular in adjusting the exposure of a face, for example.
For this tool, I chose an image that I was partially happy with. I took this photo during Liberation Day in Hanoi, Vietnam.
I really like the expression on the boy’s face but shooting with a 23mm cropped lens I couldn’t get close enough to cut out all the distracting visual noise in the background.
I kept trying, which is why I ended up with the expressive face, but with a very ugly and messy background. The thing that bothers me the most is the woman in the green dress.


So I gave the file quite a makeover as you can see. I started by cropping the file and then using Portrait Bokeh to blur the background so it would be less distracting.
I converted it to black and white because I thought the purple light was a little distracting. Then I used Relight to shift the contrast between the background and foreground, made some minor adjustments to the face, and used Denoise to get rid of the noise caused by the high ISO.
I really like the end result, it really represents the feeling of the moment and even the whole evening.
Luminar Neo really came through for this image and it’s a perfect example of what it can do. Pretty amazing.
Is Luminar Neo Worth It?
In this Luminar Neo review, you’ve heard me say several times that the result of the editing process represents the feeling and mood of the original scene.
This is actually the goal of editing. What we want to do in editing is to bring out the feelings of the scene, the subject, or the situation. To make visible the reason why we wanted to make the photo in the first place.
Photography is about capturing moments, but what comes after is just as important. We want to make sure that we can preserve those memories in an accessible way that allows us to find the moments we are looking for quickly and easily.
And then we want our images to come to life, we want them to evoke the emotion of the moment, and we want them to take us back in time. To do that, we have to edit, we have to enhance, we have to tinker until we’re happy with the memory staring back at us from the screen.
Does Luminar Neo help you do that? Yes, it does, every step of the way and then some. It allows you to extract the essence of a scene, situation, or subject almost effortlessly, and that’s what editing software needs to do, AI-powered or not!
Let us know in the comments what your take is on artificial intelligence in photography. Which way are you leaning?
When you purchase through the links in this article I earn a small fee at no extra cost to you.
Thank you for your support 🙂
10% off luminar neo
I’ve partnered with the people at Luminar Neo to get you a special deal. When you apply the coupon code PP10NEO at checkout, you’ll get a generous 10% discount!


0 Comments