

What is a Bokeh Background?
The meaning of the word bokeh (pronounced boh-kay) is blur. It comes from the word Boke in Japanese.
It describes the buttery quality of the soft, out-of-focus areas usually in the background. It adds an aesthetic, visual element to the photo. It’s induced by the camera lens and the result of your settings.
Why does it matter?
Bokeh is a wonderful way to give a smooth and beautiful creamy touch to your background. It’s very pleasing to the eye.
Here are some specific reasons to create a bokeh background in your photos.
Create Negative Space
Negative space is a composition tool where you look for a homogenous background. The background is made of similar colors, forms, and textures. Negative space is a good composition tool to drive attention to your subject.
If you can’t find a good background for a negative space composition you can use bokeh to blur the background.
The colors, forms, and textures will become so blurry they sort of flow into each other.
Instead of different structures, the viewer sees an undivided whole.
This creates the kind of homogenous background that’s so important in negative space.

Emphasize the Subject
When the only razor-sharp element in the frame is your subject and all else is blurry it easily attracts the attention of the viewer.
And that’s what we want in photography. We want our subject to stand out. We want to make sure the viewer knows what our photo is about.
Creating a bokeh background is a wonderful way to do that.
Create Depth
The contrast between the focused subject and the blurry background will immediately introduce depth to your photo.
Hide Distracting Elements
If your background is messy and distracting adding a bokeh background will hide those distracting elements.
Create Contrast
If you didn’t know it already you know now. Photography is about contrast.
The contrast between bright and dark areas, colors, ideas (we call it juxtaposition).
And the contrast between sharp, in-focus and blurry, out-of-focus elements in the frame.
Set a Mood
A bokeh background can create a dreamy, misty atmosphere in a photo.
Especially in portrait photography, a bokeh background creates a mood and feel that makes it easier for the viewer to connect to the people in the photo.

4 Steps to a Bokeh Background
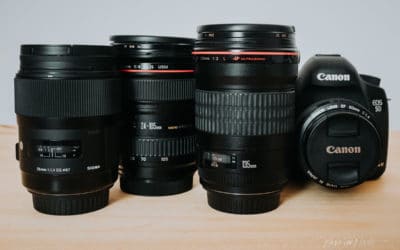
#1 The Best Lens
It’s not so much about the focal length of a lens as it is the ability to select a very wide aperture.
In general, with kit lenses and zoom lenses, the widest aperture will be around 5.6.
When you’re up for buying a new lens, be on the lookout for the maximum aperture. Anything wider than 1.8 is gonna be great for creating the soft and smooth bokeh backgrounds you’re after.
A prime lens will definitely be the better choice. Although there are zoom lenses with a maximum aperture of f1.8, they are for sure the more expensive choice.
In the end, the focal length of the lens will be a factor but not as much as the other aspects that influence bokeh.
Find out more about lenses: Prime vs Zoom Lens – The Ultimate Guide to Help You Decide.
#2 Select a Wide Aperture
If you’re not yet confident enough to shoot in manual mode you can select the Aperture Priority Mode to select a wide aperture.
In aperture priority mode, you select a wide aperture between f2.8 and f1.4. The camera will choose the appropriate shutter speed.
When you’re setting your aperture, you have to keep in mind that selecting the widest aperture your lens can produce will result in overall blurriness.
You want your subject to stand out. That’s why you want to create a bokeh background.
But the range of sharpness in the widest setting is so small, it makes it really difficult to get your subject in crisp focus.
It’s better to select an aperture that is 1 or 2 stops above the maximum aperture of your lens.
So if the maximum aperture is f 1.2, it’s best to select an aperture of f1.4 or f1.8.
Now you see why it’s important to pay attention to aperture when you’re getting yourself a new lens!

#3 Get Close
Distance matters. A lot! You need to get close to your subject. Especially when you’re shooting with a 35 mm or 50 mm full-frame.
When you’re photographing with a longer focal length like 80 mm or 135 mm full-frame, it matters less.
Then you need to make sure to focus on your subject.
Because the whole point of bokeh is the separation of subject and background, you want your subject to be really crisp.
Go here to discover more about focus in photography.
#4 Choose a Far Away Background
And finally, you want to make sure the distance between your subject and the background is big enough.
The more distance you create between subject and background, the smoother the bokeh will turn out.
This also depends on the focal length of your lens. As it does in step 3, the closeness to the subject.
Increasing the distance between subject and background matters less when you’re shooting with a long lens like 135 mm full-frame.
To Recap
- A prime lens with a maximum aperture of f1.2 or f1.4 is your best choice.
- Shoot in Aperture Priority mode (or Manual Mode) and select an aperture that is 1 or 2 stops above the maximum aperture.
- Get close to your subject and increase the distance between subject and background. This matters less when your shooting with a focal length of above 80 mm full-frame.
- Get a sharp focus on your subject to separate the subject from the background.
- Bokeh background is a wonderful way to add a soft look and feel to an image.
- You can use it to downplay distracting elements in the background.
- And it’s a surefire way to attract attention to your subject.
Did you try this? Share your photos on Instagram and mention @photography-playground!


0 Comments