
Photography Terms
I remember very well from my own learning process that learning photography can feel a little overwhelming. Especially if it seems like you don’t even speak the language associated with photography! It’s something many professions have in common, the jargon. The words only the insiders know.
Photographers throw around words like DOF, histogram, MILC, Prime and you’re like WHAT?! What does that even mean?
How to Become an Insider
The first step in learning photography is to understand the words photographers speak. So that we’re all on the same page and talk the same language. Not knowing the words can make you feel like an outsider and we don’t want that.
Are you looking for a step-by-step plan to buying your first camera? Check out this post about how to choose a camera!
Let’s start you off with words used to describe the hardware, camera & lenses.
Then we’ll move on to the words to describe the stuff your image is made of.
We’ll conclude this small dictionary of most important photography terms with the words we use to actually create the image.
Camera Words
DSLR
A Digital Single Lens Reflex camera is a camera that has a mirror and a prism to show you the image through the viewfinder.
When you look through the viewfinder the light will fall through the lens onto a mirror that sends the light to a prism on top of the camera. The prism breaks the light in such a way you can see it through the viewfinder.
The image you see is exactly the same as the image the camera will record on the sensor. Because the moment you press the shutter the mirror will fold up and the light will fall on the sensor. It is an optical representation of the scene you’re about to shoot.
MILC
A Mirrorless Interchangeable Lens Camera or ‘mirrorless’ is a camera that doesn’t use a mirror to project the image in the viewfinder. It provides you with a digital image on a display at the back of your camera and/or through an electronic viewfinder.
It is a digital or electronic representation of the scene you’re about to shoot.
Full Frame Sensor
A full frame sensor has the same dimensions as the old 35 mm film frame size. The ‘full frame’ or 35 mm format is the standard in photography. It has been like that for a very long time.
It has a wider angle and produces a higher quality file, especially in low light situations. It also has a larger dynamic range and a more shallow depth of field than a cropped sensor.
Cropped Sensor
A cropped sensor is any sensor smaller than the standard 35 mm. film frame size. It has a smaller field of view than the full frame. This influences the focal length of the attached lens and its field of view.
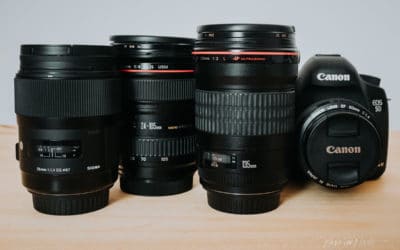
Lens Words
Focal Length
The focal length indicates the distance between the edge of the lens and the sensor.
It is an indicator of the angle of the lens. The longer the lens the more narrow the angle.
A 28 mm. lens is short and it has a wide-angle. A 135 mm. lens is long and it has a narrow angle.
Prime Lens
A prime lens or a single lens is a lens with a fixed focal length, for instance, a 50 mm. lens. The image quality of a prime lens is better than the image quality of a zoom lens.
Wanna dive deeper into lenses? Check out Prime vs Zoom Lens: The Ultimate Guide to Help You Decide
Optical Zoom Lens
A lens that has a variable focal length, for instance, a 24-70 mm zoom lens. The advantage is that you can have one lens for a lot of different angles.
An optical zoom lens achieves the different focal lengths by the physical parts of the lens. An optical zoom is always far better than a digital zoom.
Digital Zoom Lens
A digital zoom crops the image on the sensor making it look like you zoomed in. But you didn’t, the image that is just a smaller part of the sensor that’s been enlarged in a digital way.
Pixel Words
Pixel
The teeny tiny elements that make up your image. It’s short for Picture Element.
Resolution
The resolution is the number of pixels in a file. You calculate the resolution by multiplying the height by the width of the file.
Megapixel
A million pixels go into 1 Megapixel. If your sensor has 5760 pixels on the long end and 3840 pixels on the short end your total amount of pixels is 22.118.400, resulting in a resolution of 22 megapixels.
RAW File
Your pixels are the base of your picture and they’re organized in a file.
If you store them in a RAW file all the information the sensor can gather the moment you press the shutter is saved.
As a result, a RAW file gives you a lot of control and freedom to do with it what you want. The possibilities in the post-processing are huge. Think of a RAW file as the negative in the old days.
JPEG File
The JPEG file is most commonly used.
If you store them in a JPEG file it is processed and compressed in the camera the moment you press the shutter.
You’ll have less control and freedom to alter the image.
Go to Raw vs Jpeg to get a deep understanding of the difference between the 2 file formats.
Exposure Triangle
Exposure
To expose is to let light fall through the lens onto the sensor.
When a photo is too dark not enough light fell on the sensor. We call underexposed.
When it is too bright too much light fell on the sensor. We call it overexposed.
Exposure Triangle
The exposure triangle is the combination of aperture, shutter speed and ISO that leads to the exposure of an image.
Aperture
The aperture is the size of the opening in the lens through which the light falls.
A large opening will let in more light than a small opening.
F-Stop
We measure aperture in f-stops. The range of f-stops depends on the lens.
The smaller the number the wider the opening. For instance, at f3,5 the opening is wider letting more light in than at f11.
Depth of field
The Depth of Field or DOF is the range of sharpness in an image from front to back. For a large part, it’s controlled by the Aperture.
The wider the opening the more shallow the DOF will be. The smaller the opening the larger the DOF will be.
For instance, at f3,5 the background behind your subject will be blurry. At f22 the background behind your subject will stay sharper.
Bokeh
The word Bokeh is Japanese and pronounced as Bo-keh (as in kettle). It is a term to describe the quality of the out of focus areas in an image caused by a wide aperture.
Shutter Speed
The Shutter Speed indicates the time the shutter is open. The longer the shutter is open the more light falls on the sensor.
We measure shutter speed in seconds. A Shutter Speed of 1/30 of a second lets more light fall on the sensor than a Shutter Speed of 1/250 of a second. We call a long Shutter Speed also a slow Shutter Speed and a short Shutter Speed fast.
The faster the shutter speed the more a moving subject will stay sharp. The slower the shutter speed the more a moving subject will be blurry.
Camera Shake
When you shoot with a slow shutter speed the small movement the camera makes the moment you press the shutter will become visible in the image. Not just moving subjects will be blurry but the whole photo will become blurry.
ISO
The ISO (International Standards Organization) indicates the light sensitivity of the sensor.
A low ISO of 100 indicates the sensor is less sensitive to light than with a higher ISO of 2000.
Photographing with a high ISO can give you the opportunity to photograph in poorly lit environments but you’ll have to put up with the noise.
Noise
Noise, also referred to as grain is the appearance of color artifacts, small colored dots in an image. You can actually see the pixels. Noise is the result of photographing with a high ISO.
Metering & Exposure
Metering Modes
The different ways the camera measures the light through its built-in light meter.
With metering modes, you can choose how the camera is measuring the light.
- Matrix metering measures the light from the entire scene.
- Center-weight metering measures the light mostly on the area in the middle of the frame.
- Spot metering measures it where you have you have your focus point.
Wanna know more about light? Go to the Natural Light Photography Guide.
Exposure Modes
With exposure modes, you can choose between the different ways you set the exposure.
- In Auto Mode, the camera will set the shutter speed, aperture, and ISO. You can use the exposure compensation to under- or overexpose.
- In Program Mode, you gain a little more control. You’ll be able to set the ISO yourself and the camera will select the shutter speed and aperture. You can also deactivate the automatic flash and make use of exposure compensation in program mode. It is the perfect stepping stone to move away from auto mode.
- In semi-auto mode, you set the ISO and shutter speed or aperture yourself. The camera will establish the needed third value. In shutter speed priority mode you set the shutter speed and the camera will calculate the aperture. In aperture priority mode you set the aperture and the camera will calculate the shutter speed. You can also use exposure compensation in semi-auto mode.
- In manual mode, you have total control over ISO, shutter speed and aperture. Helpful instruments in determining your exposure are the built-in light meter and the histogram.
Check out this post to get the motivation to learn Manual Mode. You’ll also find a PFD guide about shooting in Program Mode in there.
Histogram
The histogram is a visual representation of all the tones in a photograph.
You’ll find the dark areas at the left side of the histogram. The bright areas are located at the right side of the histogram. The mid tones are in the middle.
You can use the histogram to determine if an image will be ‘properly’ exposed.
When there is a large spike on the left side of the histogram you can be pretty sure the image will be too dark.
If there is a large spike on the right side the image will be too bright.
Exposure Compensation
The camera calculates the average of the lighter and darker areas in an image to come up with an exposure setting.
If necessary you can under- or overexpose in relation to the exposure the camera sets. We call it exposure compensation.
One situation where you always need to compensate for your exposure is when you photograph a sunset.
Read More: 10 Sure-Fire Tips for Stunning Sunset Photography.
Focus Words
Focus
If a subject is in focus it means it’s sharp. If it’s out of focus it’s blurry.
Not to confuse this with Bokeh or the out of focus areas when photographing with a shallow DOF.
Focus Modes
The different ways the camera can set the autofocus.
- In One-Shot (Canon) and Single Shot (Nikon) focus mode, the camera will focus on the subject and as long as you keep the shutter half pressed it will stay like that until you release the shutter. It is the most commonly used focus mode.
- In AI Servo (Canon) and Continuous (Nikon) focus mode, the focus will adjust as long as the shutter is halfway pressed. Use it for action and sports photography. Anything that’s moving fast.
- AI Focus (Canon) and AF-A (Nikon) is a hybrid mode. The camera will start off in a single image focus mode and if the subject starts moving it will transfer to continuous focus mode.
- In Manual Mode, you set the focus yourself. Modern cameras are not really very well equipped to do that though. And it’s in most cases not necessary because the autofocus is very fast and accurate.
Focus Point
The matrix in your viewfinder has different points where you can determine your own focus point.
If you don’t determine a focus yourself the camera will do it. And the camera will focus on the first thing it encounters right in the middle.
Back Button Focus
Back-button focus is mostly used by more advanced photographers. It removes the activation of the auto focus function from the shutter and assigns it to a button at the back of the camera. This way the shutter and autofocus are managed separately resulting in more control.
Color Words
Color Temperature
Every light source has its own color temperature.
For instance, the color temperature of candlelight is different from the color temperature of a flashlight.
And our biggest light source of all, the sun, has different color temperatures depending on the time of day and the weather conditions. The color temperature early in the morning is different from the color temperature during the day.
We describe the color temperature of the light by being warm, yellow light or cold, blue light. The light a candle produces is warm and yellow. The light the sun produces during the day is cold and blue.
It is measured by degrees Kelvin.
White Balance
Our brain automatically compensates for all the different light sources in our environment to keep the colors as they are. The camera can’t do that. That’s what the white balance setting is for. It compensates for the different light sources by adjusting the colors.
Usually, you can choose between automatic white balance and a number of different light situations like shadow, bright sunlight or artificial light.
You can also set the white balance manually through the Kelvin settings.
The automatic white balance will do an okay job in a lot of light situations but sometimes you need to adjust the white balance setting.
Check out composition in photography to discover the essential composition principles.
If there’s a photography term you didn’t find in this list join the Facebook Group and ask me! Of course, you can also leave me a comment.


0 Comments