

Portrait Photography Outdoor
Like most portrait photographers I’ve had a studio for years where it’s possible to control just about everything but I’ve always preferred the unpredictable nature of portrait photography outdoor.
Candid Photography versus Portrait Photography Outdoor
Because it brings more of a candid vibe into the process of photographing. But it is for sure not the same. In candid photography, people are usually not aware that you’re photographing them. You are also not supposed to interfere in candid photography.
That is the biggest difference between candid photography and outdoor portrait photography. Your subject is very much aware that you’re taking photos.
Sometimes that awareness turns into a little roadblock because people don’t feel comfortable being photographed. But because you can actually interfere you’re able to make your subject feel at ease.
Some aspects fall outside of your control when you’re shooting portraits outside. Thus photographing outdoor portraits comes with its own set of challenges but that makes it also very exciting.
I’m guessing you wish you had a little more control over the process of portrait photography outdoor. And your mind is filled with questions.
How do you take portrait photos outside? What is the best setting for outdoor portraits? How do you light outdoor portraits?
You’re in luck! These portrait photography outdoor tips are gonna answer all those questions and they don’t just apply to outdoor photography.
#1 Create a Connection with Your Subject
As photographers, we prefer to be behind our camera for a reason. Most people feel a little uncomfortable when they’re being photographed. It’s important to be aware of that and establish a connection with the human you’re pointing your lens to.
Wanna read more on how to establish a connection with your subject? Go to You Think The Best Spot Is Behind Your Camera?
This is especially important if you don’t know the person. But it also holds true for photographing people you know well.
Make your subject feel at ease by keeping it relaxed. Talk a little bit, ask a question or two, and be genuinely interested in your subject.
Bombarding your subject with a ton of posing directions will definitely not help to make him or her feel at ease. It’s better to create a supportive space for natural poses and moments.
Encourage your subject by being positive, giving compliments, or asking her to repeat a certain gesture because it was so beautiful.
It also helps to start photographing right from the beginning because your subject needs time to relax and get used to the camera. Those first few shots won’t be any good but that’s okay. You just need them to get out of the way.

#2 Tell a Story
When you truly connect to your subject it will be a lot easier to come up with ideas to tell a story about the person in front of you.
This doesn’t have to be an all-revealing story. I think it’s simply not possible to tell the story of an entire human being in a single moment. That doesn’t do the complexity of being human justice. But you can capture a feeling or emotion in your subject that reveals something about being human at that moment.
Pay special attention to body language, gestures, and facial expressions. And try to go beyond the smiling faces. A relaxed face tells a deeper story with more layers than a smiling face.
And don’t forget to look at their hands. They can tell an entire meaningful story on their own.
If your subject is still not at ease and is not able to relax her face you can ask to look away from the camera so she is less aware of the camera.
Another thing I’ve found to be working well is to ask my subject to close his eyes for a few seconds, think of something that makes him happy, and then open them again.
#3 Choose Your Background Wisely
For outdoor portrait photography, your background is very important. It’s almost as important as the subject itself.
There are basically two ways to go when it comes to choosing the background. And it depends on the story you want to tell.
Close-Up Outdoor Portrait Photography
When you shoot a close-up portrait it’s best when the background is clean and uncluttered. Opening up your aperture will create a soft and blurry background that complements your subject but is not distracting.
Environmental Outdoor Portrait Photography
For environmental portrait photography, the background plays a bigger role in the photo. The environment and so the background is part of the story. It tells something about the subject. Maybe it’s a favorite spot in nature or the city. Maybe it’s a place of work.
In this scenario, you need to pay close attention to distracting elements in the frame. Adjust your point of view to reduce elements that take away attention from your subject.
Another important thing to consider when you’re shooting an environmental portrait is how the subject and the environment interact with each other. What is their relationship and how are you going to show that?

#4 Pay Attention to the Light
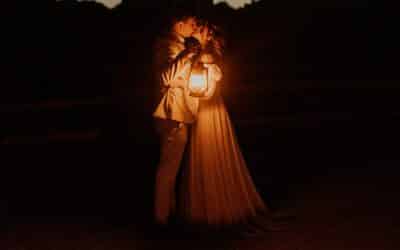
Light is super important for portrait photography outdoor for obvious reasons. And unless you’re shooting low light portrait photography at night you have plenty of light during the day.
The first thing to do is to become aware of the light. It’s the light that sets the mood for your portrait photo.
Lighting conditions fall into two categories, direct and hard sunlight and the indirect, soft light of a cloudy sky.
Your biggest enemy for outdoor portrait photography is too much harsh sunlight. When there are no clouds in the sky and the light of the sun is hard and direct you need to pay attention to how the light is falling on the face of your subject especially when it’s in the middle of the day.
Contrasty or Even Light?
But if you’re looking for large contrasts because that somehow fits your subject harsh sunlight is your friend. It will create a dynamic and dramatic play of light and shadow resulting in large contrasts.
The even light during an overcast day will result in soft shadows or no shadows at all evenly illuminating your subject’s face.
The emotion and mood coming from these two vastly different light conditions are equally different. So, it’s not so much a matter of good or bad light. It’s more about the light you need for the story you set out to tell.
This is something you’re able to control to an extent. When it’s sunny and you prefer soft light you can look for areas with open shadow. These are areas near a building, under a tree, under an umbrella. There is enough light to photograph and the shadow creates the soft light.
But when you want the harsh sunlight and it’s a cloudy day you’re in trouble. That’s not something you can make happen. Then you need to pivot and add other elements to give you the contrasty mood you want.
Golden Hour
Shooting during golden hour at the end of the day will give you opportunities for flooding your subject with warm, golden light. You can hardly go wrong with this kind of light from whatever direction it comes from.
Another thing to consider is the time of year. Letting the season shine through in your pics is a great moodsetter. The lighting conditions are different during the different seasons as well.
Wanna become a student of light? Check out The Ultimate Guide To Mastering Natural Light Photography

#5 Play with Composition
Your composition underlines the story you want to tell. And your point of view will be your biggest helper in getting the story across.
Try out different angles to see how they influence your subject and use angles that enhance the feeling of the portrait.
As a general guideline, shooting upwards from a lower angle will make your subject appear larger. An angle like this expresses a feeling of power and confidence.
And shooting downward from a higher angle makes your subject appear smaller. This angle gives more of an intimate and contemplative vide. Your subject is more in her own world especially when the subject is not looking into the lens.
When it’s just the face a slightly higher angle is usually the most flattering. It makes the facial features stand out more.
Framing your subject by making use of buildings, trees, or a wall is a great way to direct the attention to the subject and add depth to your composition.
Before you press the shutter check the corners and edges of the frame because it’s important to not cut off hands or limbs at places that look odd.
The headroom, the room above the head of your subject is also important to keep track of. Too much creates an unbalanced composition and too little like right above the eyes creates an imbalance of a different nature. It’s not very pleasing to the eye.
Check out 4 Essential Principles of Composition in Photography for a deep dive into composition.

#6 Best Lens for Portrait Photography
The best lens for outdoor portrait photography depends largely on the story. Yes, again with the story!
Listen, if you’re going to photograph just the face you need a different lens than when you’re shooting environmental portraits.
Close-up or Environmental?
For a close-up, you’ll want a focal length of at least 50 mm full-frame or longer. 80 mm full-frame is considered a great portrait lens. I even use a 135 mm full-frame. The longer the lens the more blurry the background becomes. This also depends on your aperture setting which we will discuss in the next tip.
For an environmental portrait, a 50 mm full-frame will work but a 35 mm will be even better.
Another thing to consider when deciding on the focal length is how comfortable your subject is. If he or she feels very uncomfortable in front of the camera a longer lens is best to not be so up in her face.
When my subjects tell me they don’t feel at ease being photographed I start with the 135 mm. This allows me to be a little further away from my subject and still photograph a close-up. But more importantly, it gives my subject the chance to get used to being photographed. After some time with the 135 mm I’ll switch to either the 50 mm or the 35 mm.
One, Two, Or Ten?
The second thing to consider is the number of people you’re photographing outdoor. If it’s just one or two you’ll be fine with all of the above lenses and everything in between. But if it’s a small group of people you’ll need the 50 mm or 35 mm to get them all in the frame.
I’m always a big advocate for prime lenses. The quality of a lens with a fixed focal length is better than the quality of a zoom lens.
But a prime lens also makes you a more active, creative, and involved photographer. Because if you want to come closer or move further away you have to walk. This allows you to see more possibilities.

#7 Best Outdoor Portrait Photography Camera Settings
The best thing is to shoot Raw because this gives you endless options in the editing phase.
If shooting in Raw freaks you out you can always select the option in your camera to shoot in Raw and Jpeg. But seriously, there’s nothing scary about shooting in Raw.
Read Raw versus Jpeg for more detailed information about shooting in Raw.
Focus on the Eyes
For any portrait picture, you want the eyes to be tack sharp and that’s no different for portrait photography outdoor. Always focus on the eyes! To help you do that set your camera’s drive mode in the single-shot or one-shot mode. And select the single point mode in the focus mode.
More info on How to Get Sharp Focus in Photography here.
Exposure Settings
And finally, the exposure settings. Since you’re shooting outdoor during the day you’ll have no problem keeping your ISO in the low range of ISO 100 to ISO 600.
As a general rule of thumb, you want to keep your ISO as low as possible but you do not want to sacrifice on shutter speed.
Shutter speed influences the sharpness of your pic big time so this is important.
When you’re still a beginner a shutter speed of 1/250 is a safe place to start. When you’re getting more experienced you can set slower shutter speeds like 1/125.
This is your baseline. The biggest impact on how your photo will look comes from your aperture setting.
It’s your aperture setting that determines if the background is soft and blurry or clean and crisp.
A wide aperture like 2.8 or 4 gives your background that soft look and high number like 8 or 11 results in a sharp background.
So, it won’t come as a surprise to you that the type of portrait, the feelings, and the story play a big role in determining the best aperture.
In general, for a close-up of one or two people, you want a soft background and select an aperture of around 4.
And for an environmental portrait, you want the background to be in focus and you select an aperture of around 8.
If you’re photographing a group of people you also want to select an aperture of around 8 to make sure everybody is in focus.
The best way to achieve this is to shoot in aperture priority mode or manual mode of course.
Not there yet? Download my free Starter Photography Playbook to get you started. Also, check this post about Shooting in Manual Mode.
#8 What to do in Post Processing
No photo is ever finished without a little love in post. The trickiest thing with portrait photography outdoor is skin tone.
Hopefully, you shot in Raw because here is where the magic of shooting in Raw comes to the surface. Because you can adjust the white balance and thus the color of the skin for the full range in a Raw contrary to a Jpeg file.
Another thing to look at while you’re photo editing is cropping. If you forget to check the edges of your frame before pressing the shutter here’s where you can correct that. Of course, you can’t add anything but if for instance a hand was cut off halfway it’s better to crop the entire hand out. Because a strangely cut off hand will take away the attention from the face.
Converting a beautiful portrait into black & white is definitely a thing to consider. Sometimes removing the distraction of color is exactly what a portrait needs to become more intense and meaningful.
Final Thoughts
As you’ve discovered there’s no recipe for great portrait photography outdoor. It all depends on what you want your subject to express.
That starts with connecting to the person and getting in touch with the story, the feelings, and the emotions.
Every choice you make after that will come easy because it provides you with a roadmap for creating the expressive portrait you see in your mind.
And makes the human you photographed happy and proud. There’s no better feeling than making a photo of someone and he or she loves the end result.
Let us know in the comments if you’ve experienced this feeling!
Did you try one of the tips? Share your photos on Instagram and mention @photography-playground!


really nice blog thanks for sharing
Thank you 🙂 glad you liked it.
Thanks for sharing. Nice blog
Thank you! Glad you like it 🙂
Keep sharing. Have a good day!
Thank you and have a good day!
It is very adorable portrait photography, I like that please keep sharing.
Thank you 🙂
Amazing blog thanks to sharing with us.
Thank you!
Thanks for the blog, very useful, and very informative.
You’re welcome 🙂
Your Writing is very well, Thanks for sharing.
Thank you!
knowledgeable content
Thank you!
knowledgeable content
Thank you 🙂
This is really interesting, you are such a great blogger.
Thank you, glad you like it!
THIS IS INCREDIBLE! Professional work. 💯💯 thank you for the information
Thank you and you’re welcome 🙂
Thank you so much for this knowledge blog
You’re welcome 🙂 Glad you like it!
Hey, very interesting blog. Very creative ideas. Keep sharing. Have a good day!
Thanks! So glad you enjoyed it 🙂
I would like to thank you for sharing this blog very helpful to me.
You’re welcome. Glad you liked it 🙂
Thank you for sharing this blog. Very helpful to me. Keep sharing
Thank you, glad you find it helpful!
I like to click portrait Photos and i read this whole Blog. I just like these all tips and i will apply it surely. Very interesting blog and keep posting your ideas!
Hi Maria, thank you. Glad you like it 🙂